
|
|
|
 |
| Thread Tools |  |
 05-06-2014, 02:02 PM
|
#1 |
Status: Director of Training
Join Date: Apr 2013
Posts: 675
|
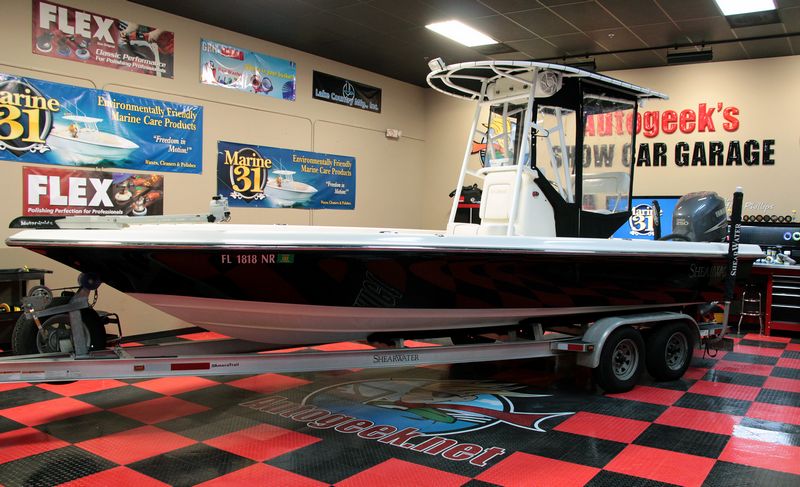
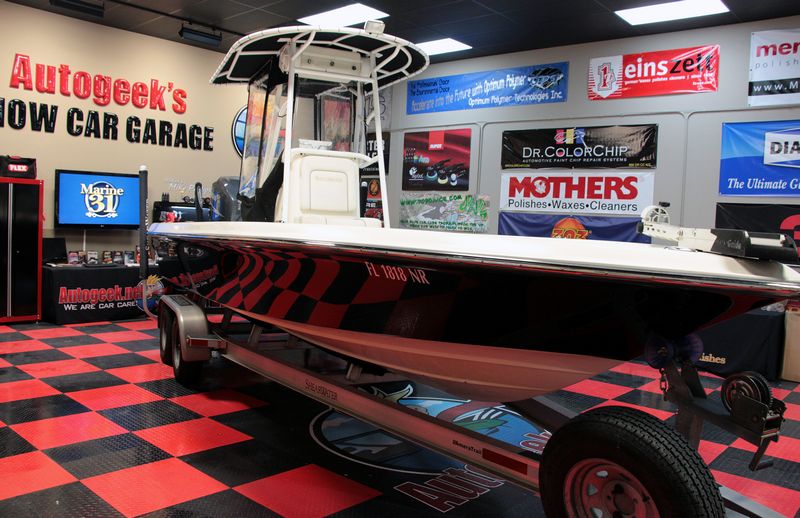
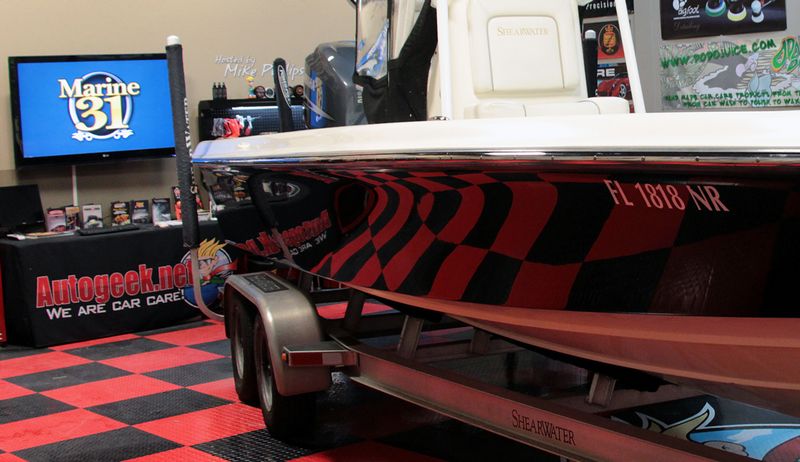
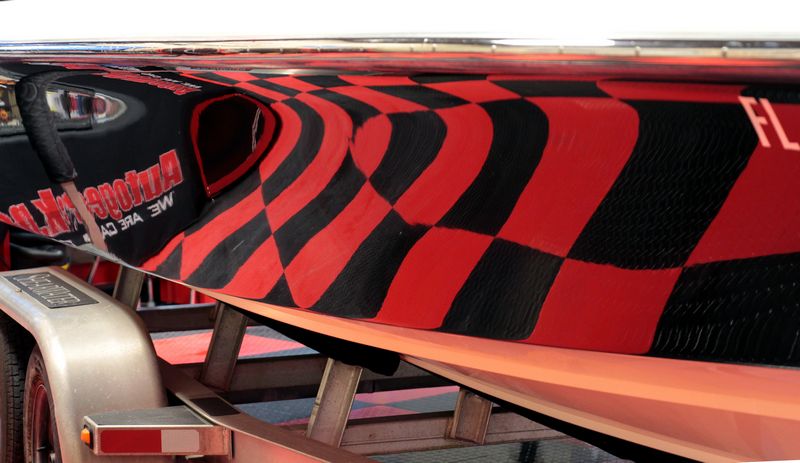
How to wetsand, cut and buff a gel-coat boat
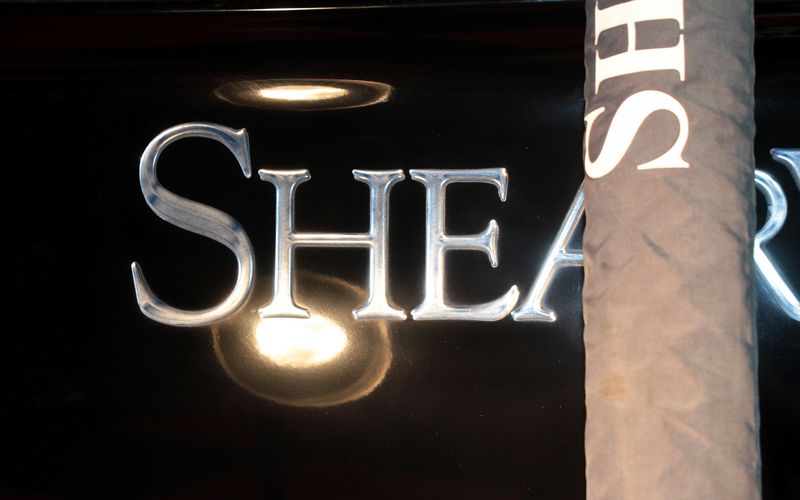
 How to wetsand, cut and buff a gel-coat boat Here's the "before" pictures to document the condition of the boat before we started this project. 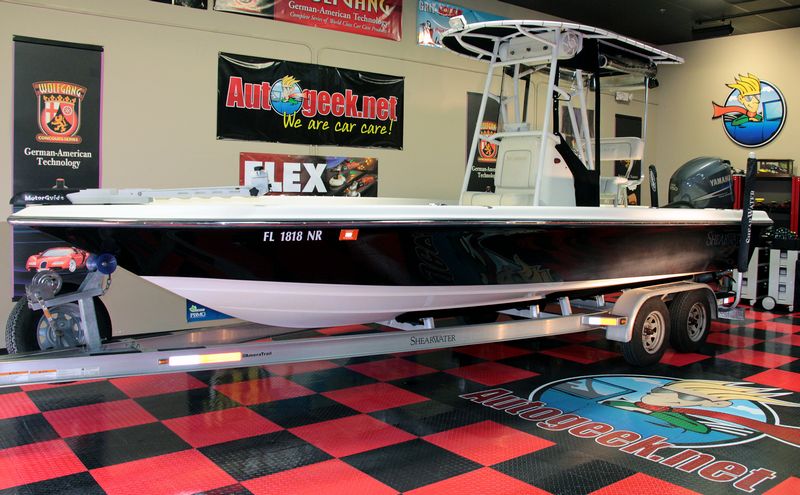  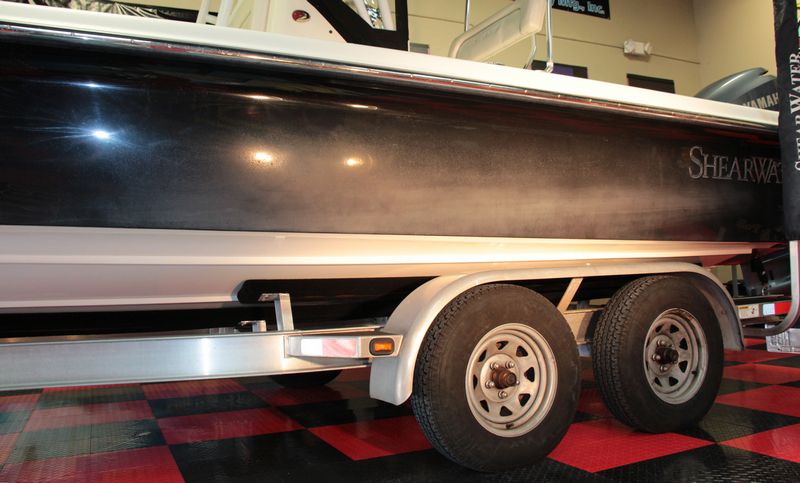 Holograms in gel-coat The below picture is a full size section cropped out of the above resized picture. The lines you see running back and forth across where the flash from my camera is lighting up the side of the hull are holograms from a rotary buffer. 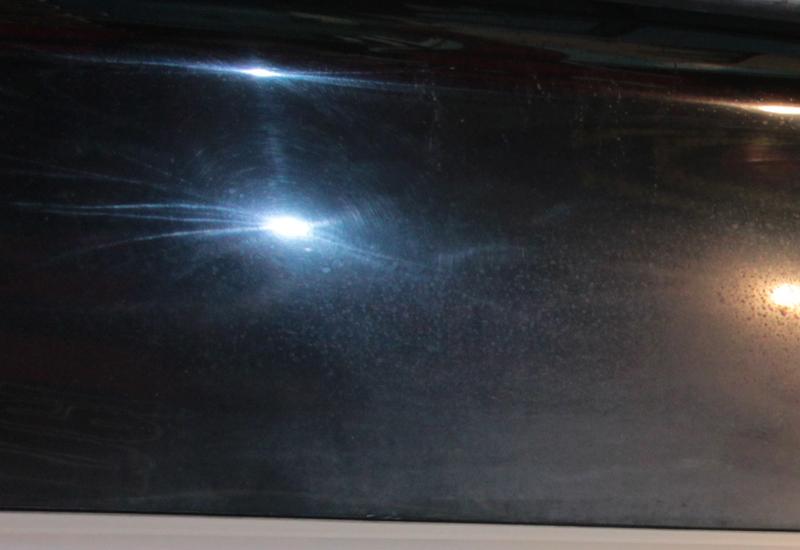 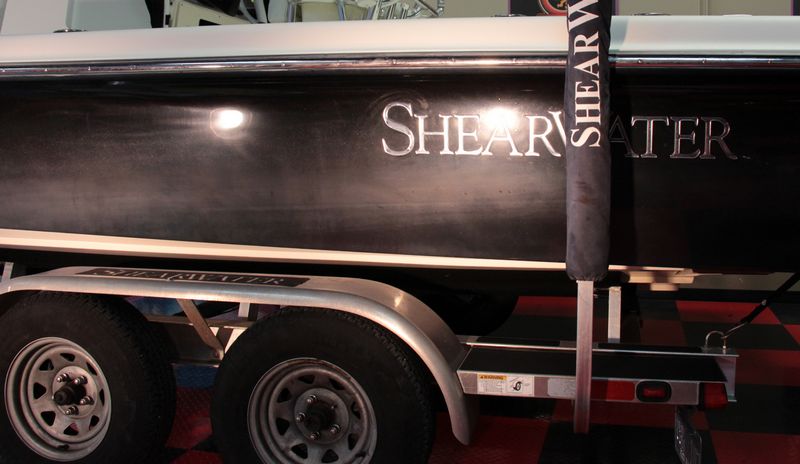 Holograms in gel-coat The below picture is a full size section cropped out of the above resized picture. The lines you see running back and forth across where the flash from my camera is lighting up the side of the hull are holograms from a rotary buffer. 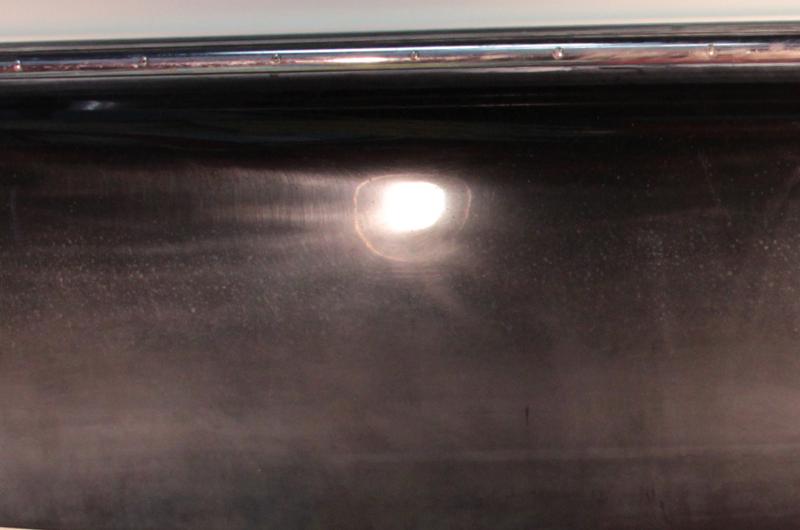 These graphics that spell out Shearwater are a soft form of plastic that feels like rubber. If you run a buffing pad on a rotary buffer over them you will harm them and even disfigure them. All of the gel-coat in and around these graphics will have to be addressed very carefully. 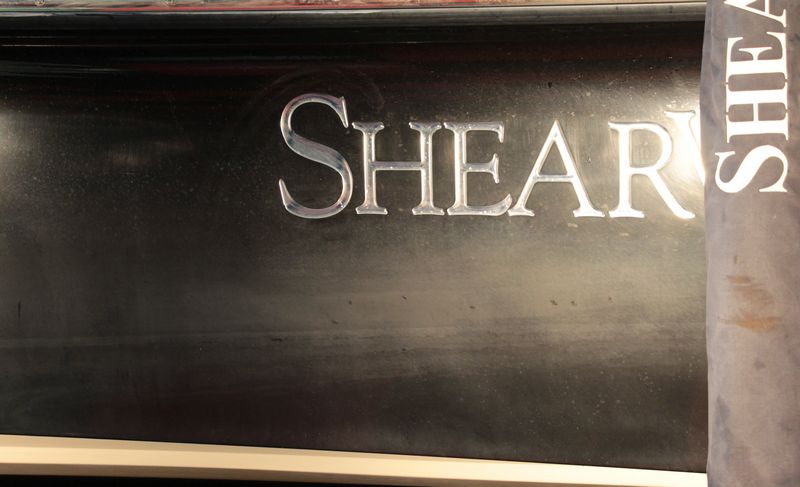 Water Spot Stains & Oxidation Not only is the entire hull filled with holograms from the misuse of a rotary buffer, (the normal practice by most boat detailers), the gel-coat is also oxidized and covered with water spot stains. 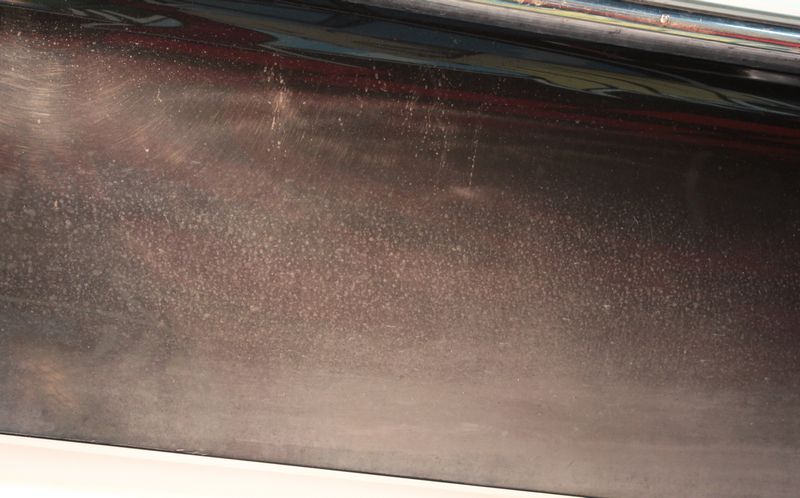 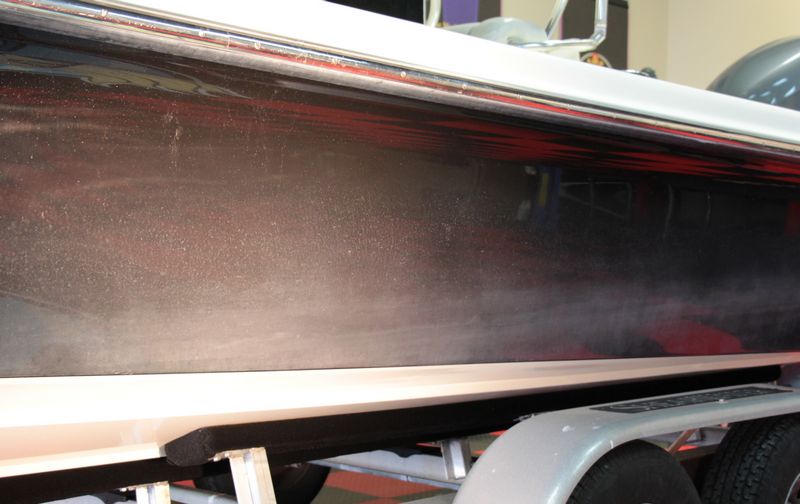 Oxidized Gel-coat The top side is oxidized from exposure to the sun. The white gel-coat cap has no gloss, shine or reflection. Gel-coat in this condition is very porous and will tend to deteriorate even faster than gel-coat that is smooth, glossy and sealed with wax. Because the sides of this boat are filled with holograms, more than likely from someone finishing while using a wool pad on a rotary buffer, chances are VERY good that the top side is also filled with holograms it's just with the oxidation and because the gel-coat is white we can't see the holograms. That doesn't meant they are not there, it just means we can't see them. We still have to remove them.   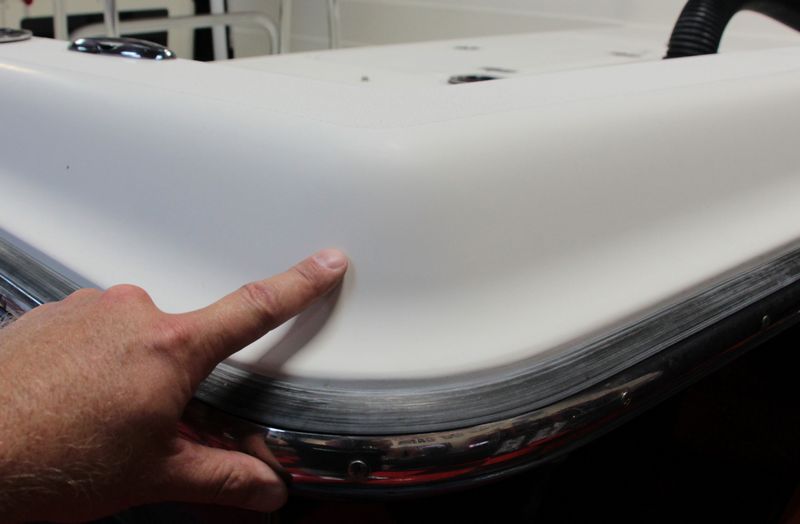  
__________________
Made by boat people for boat people... |

|

|
|
05-06-2014, 02:03 PM
|
#2 |
|
Status: Director of Training
Join Date: Apr 2013
Posts: 675
|
Did some Test Spots today. "Yes", I always do a test spot on cars that I buff and certainly do them to boat.
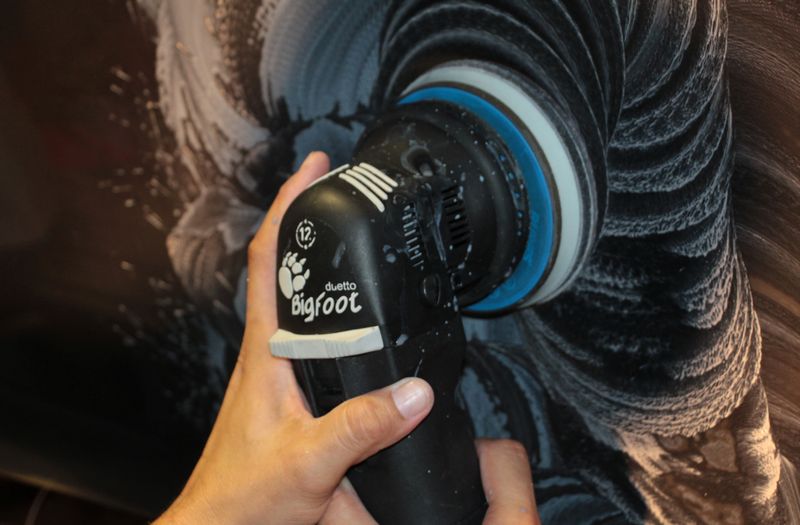
Started with the least aggressive method approach and then finally decided to just test out some wetsanding and get it over with. The entire boat looks like what you see on the right hand side of this picture AND this is WASHED and DRIED. The oxidation, water spots and stains are on and in the gel-coat. 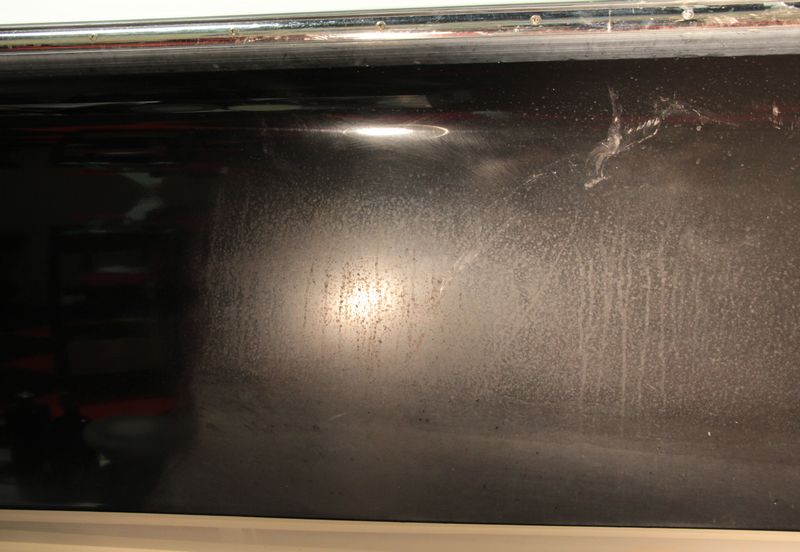 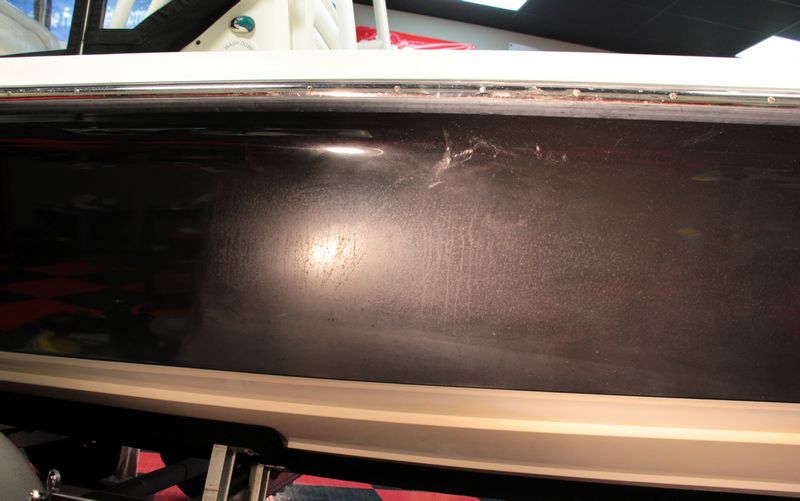  This is the Rupes Duetto 12mm orbital polisher/sander and Rupes foam backed #3000 grit sanding discs. 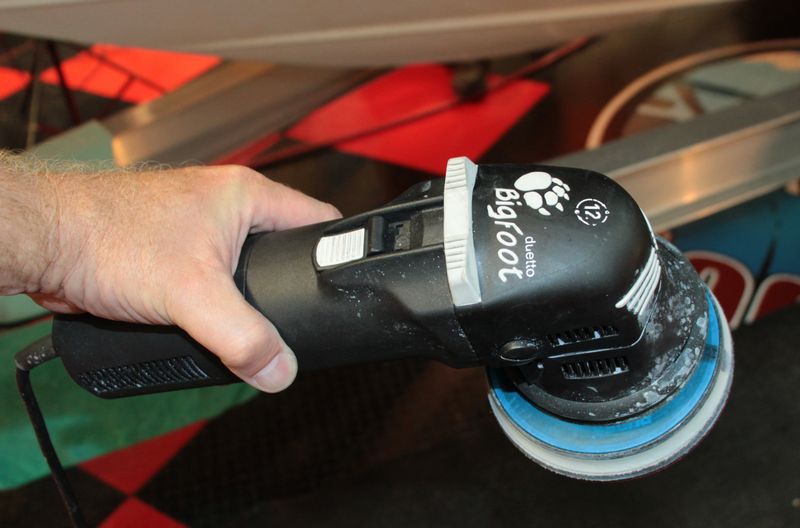 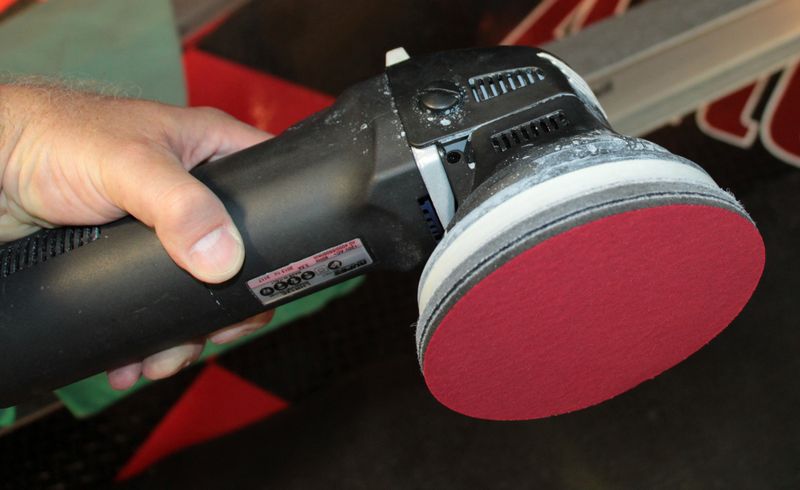 g gThis section has been machine sanded, technically called damp sanding because you only use a LITTLE water not a lot of water so it's not WET sanding it's DAMP sanding.  This is after compounding and polishing  This is after machine waxing...  Tools, pads and products... 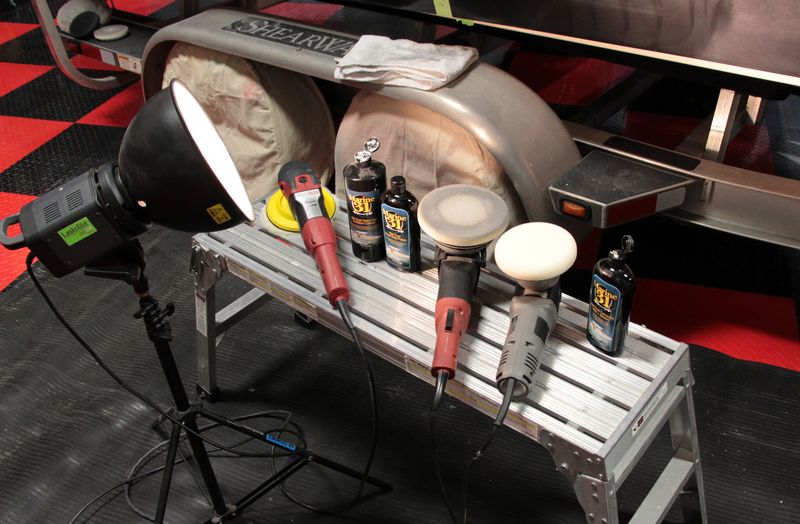 After doing some testing, sanding is the way to go with this project. As soon as the guys start showing up we'll get a couple of guys going on the sanding step.
__________________
Made by boat people for boat people... |
|
|
|
|
05-06-2014, 02:03 PM
|
#3 |
|
Status: Director of Training
Join Date: Apr 2013
Posts: 675
|
It's 5:00 O'clock and we're ready to get started!
Here's Antti machine damp sanding the hull of this Shearwater to quickly remove 6 years of oxidation, staining and water spots. 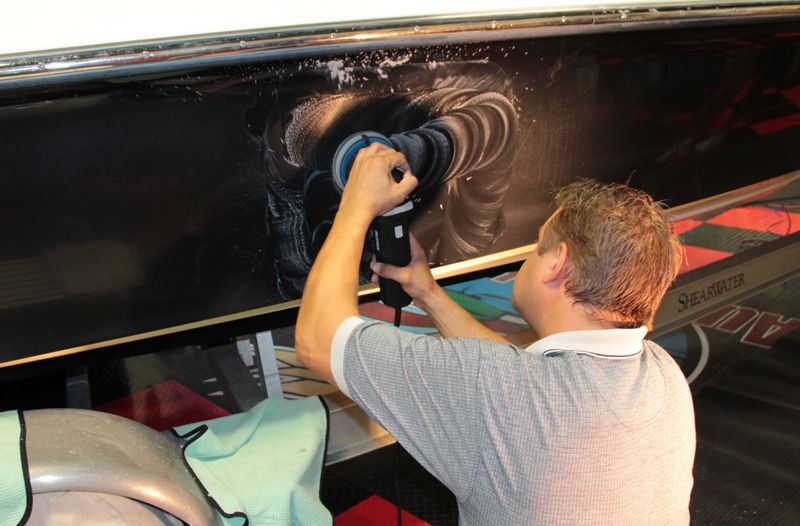 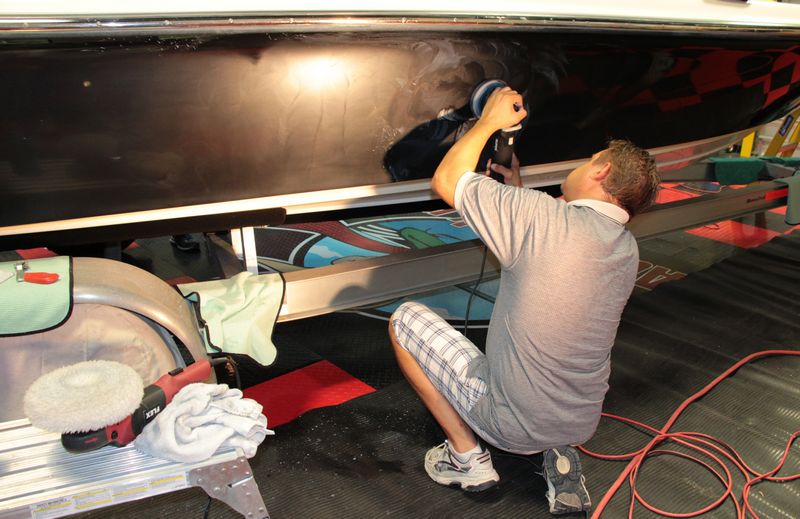  Here's John sanding down the other side.... 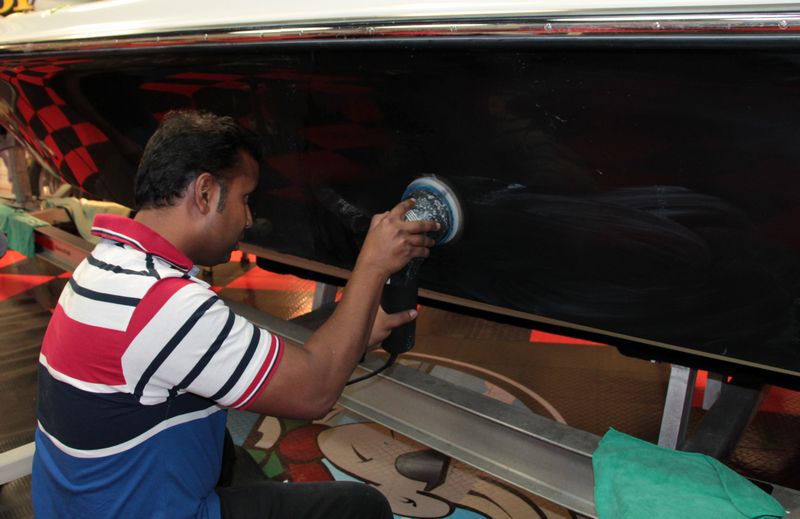 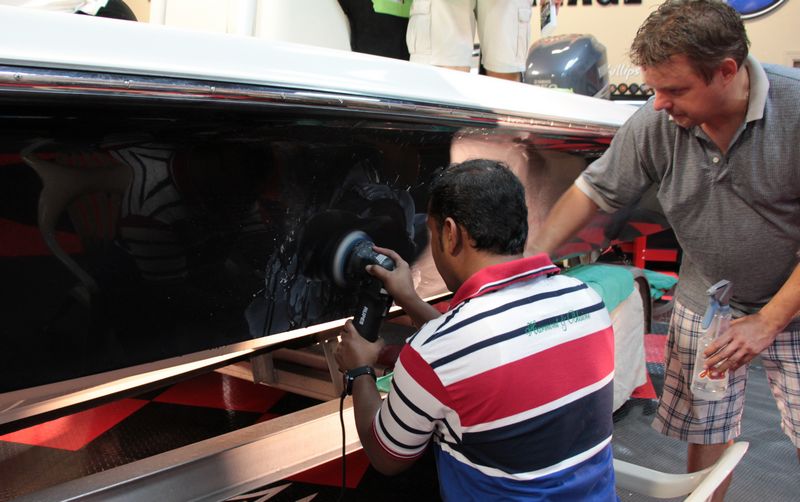 This was John's first time to machine sand a boat using a Rupes Duetto....   Here's what the sanding marks look like as John works down the side of the hull....   Sanding is the easy part.... getting out your sanding marks is the tricky part...
__________________
Made by boat people for boat people... |
|
|
|
|
05-06-2014, 02:04 PM
|
#4 |
|
Status: Director of Training
Join Date: Apr 2013
Posts: 675
|
Compounding
As some of our team moved around the hull wet sanding some of the rest of followed by removing the sanding marks by using a wool pad on Flex PE14 rotary buffers with Marine 31 products. Craig Craig has been coming to AG for over a year now and I don't think he's missed a single boat project. 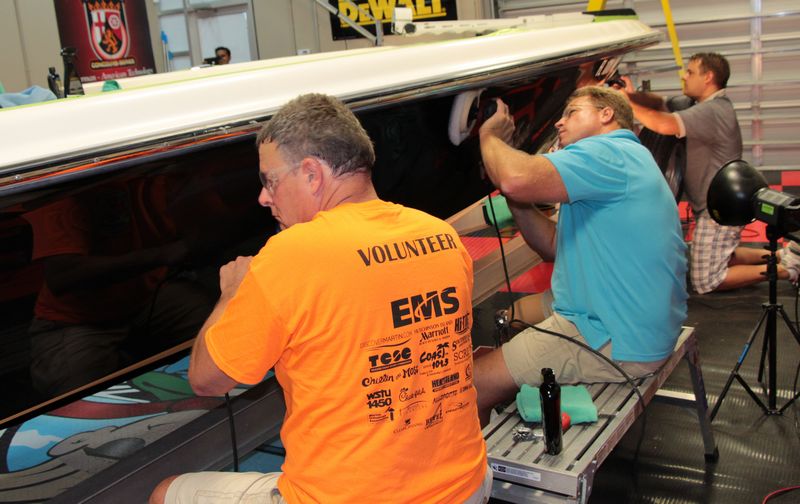 Spurring a pad Anytime you're buffing gel-coat it's important to clean your wool pad OFTEN using a steel pad cleaning spur like you see here....  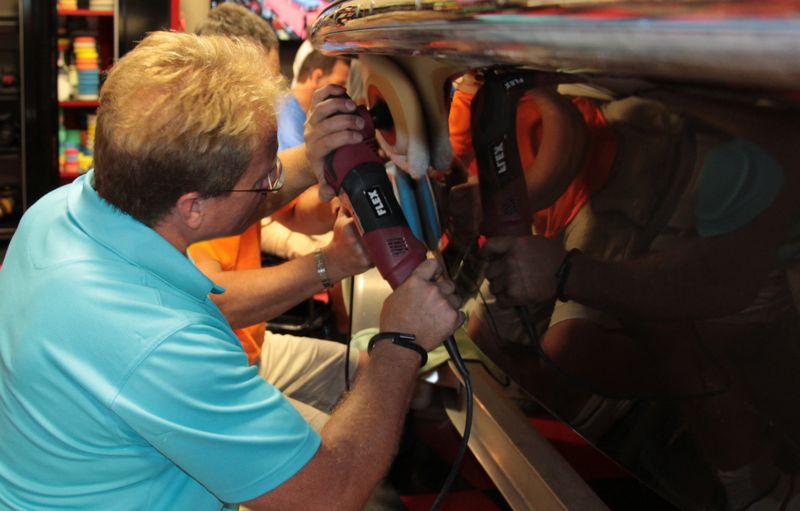 Jay Here's my buddy Jay, you'll be seeing his 1971 Chevelle coming up soon for another wet sanding project.  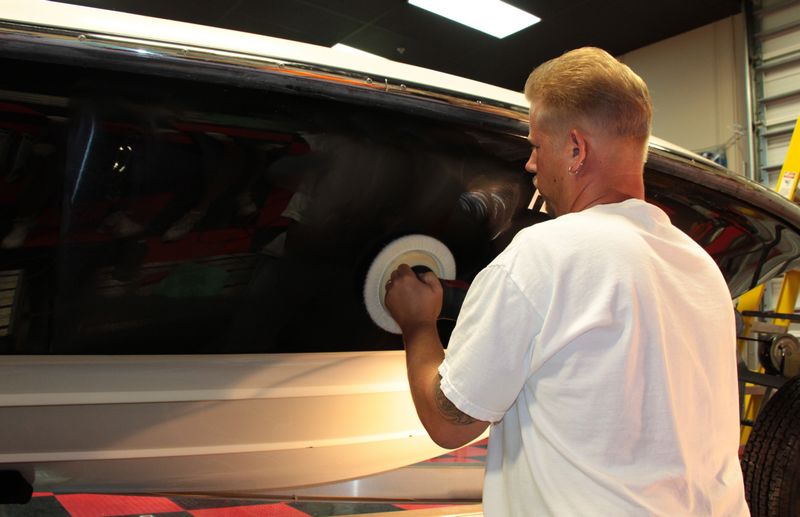 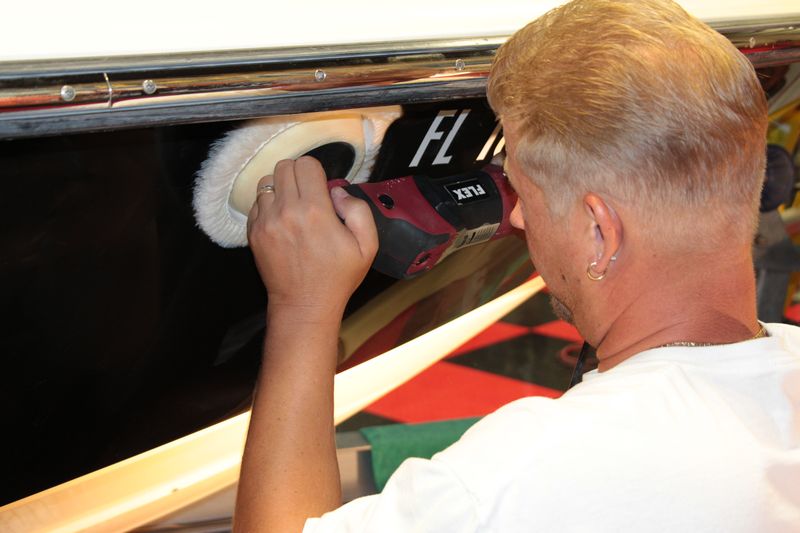 Gerald Jay brought his buddy Gerald to help out, this is Gerald's first time buffing out a boat. 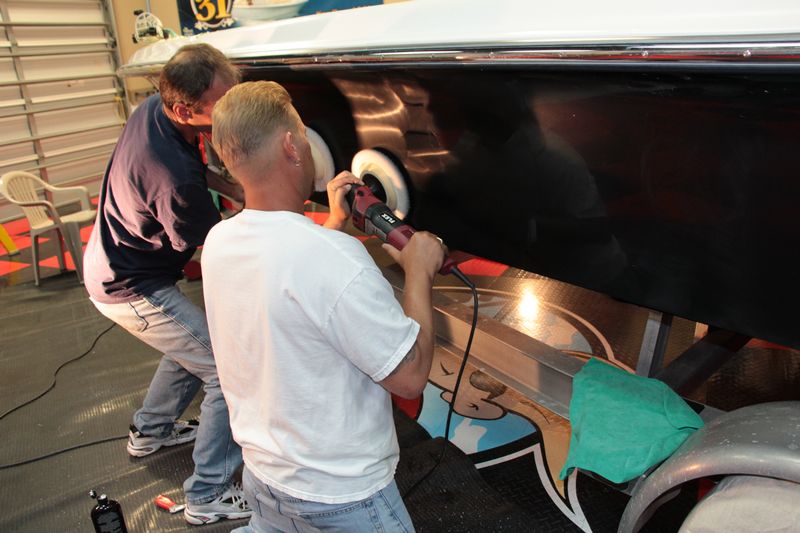 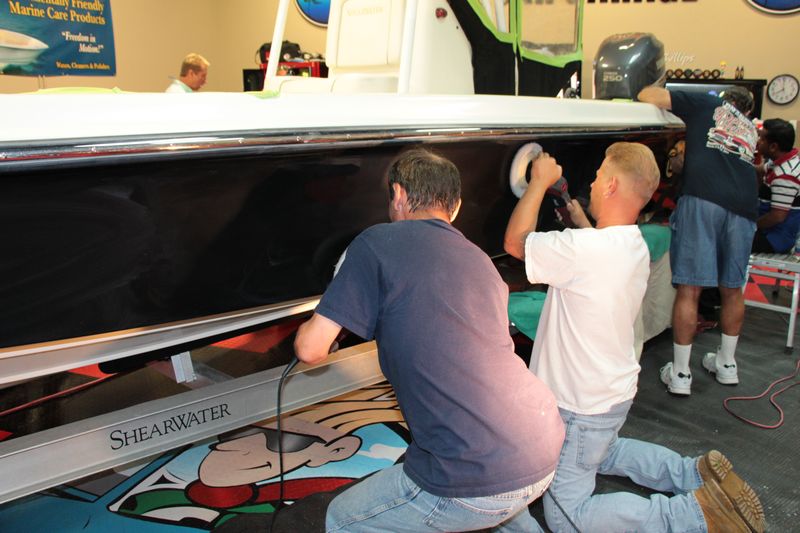 John John was sanding but after the sanding he dove right back in helping to remove the sanding marks. 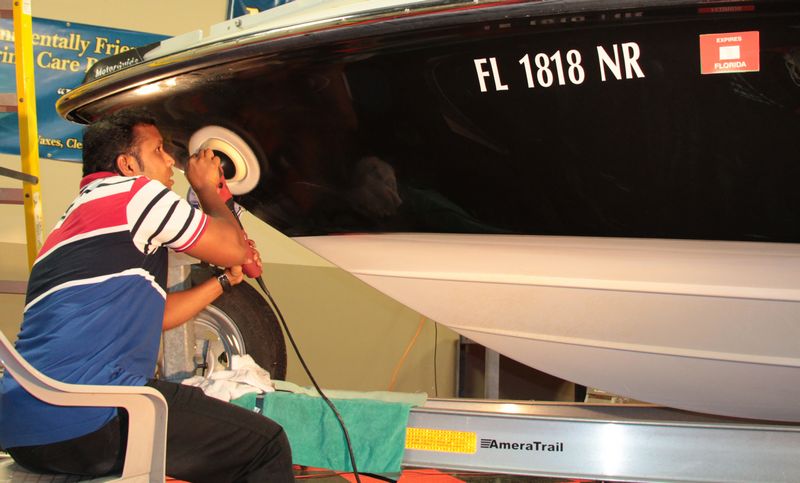 Frank Here's Frank adding fresh product to the face of his pad... 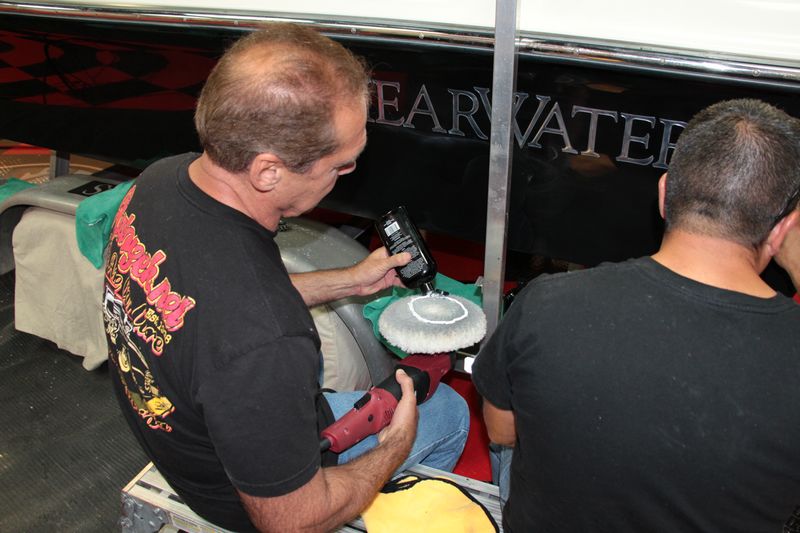 Ozzy Frank brought Ozzy with him to learn the some of the tools and techniques for restoring oxidized boat as Ozzy has an oxidized boat too. 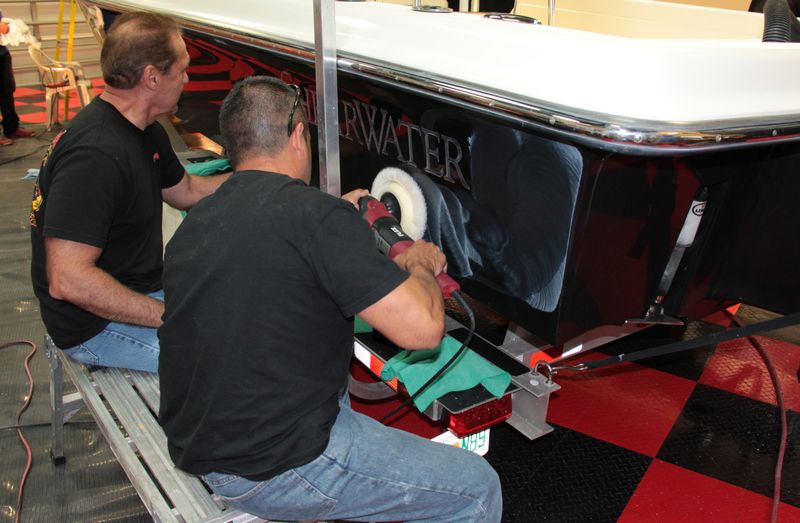  Robert Robert is no stranger to the rotary buffer or hard work.... 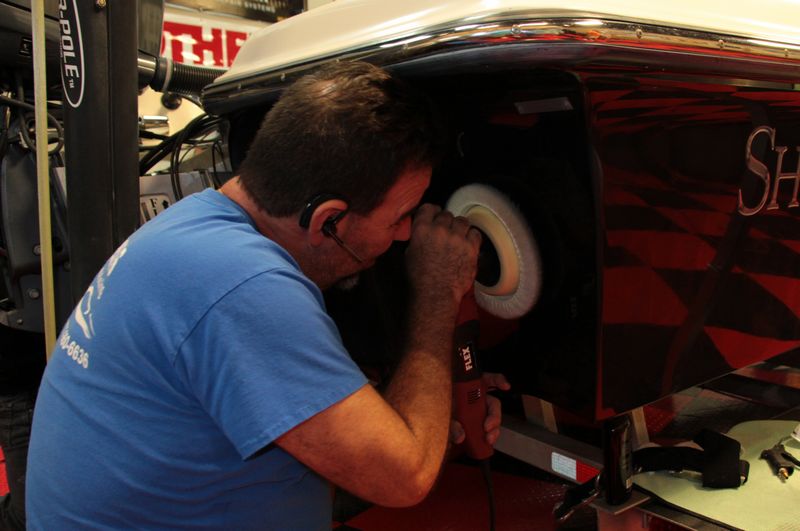 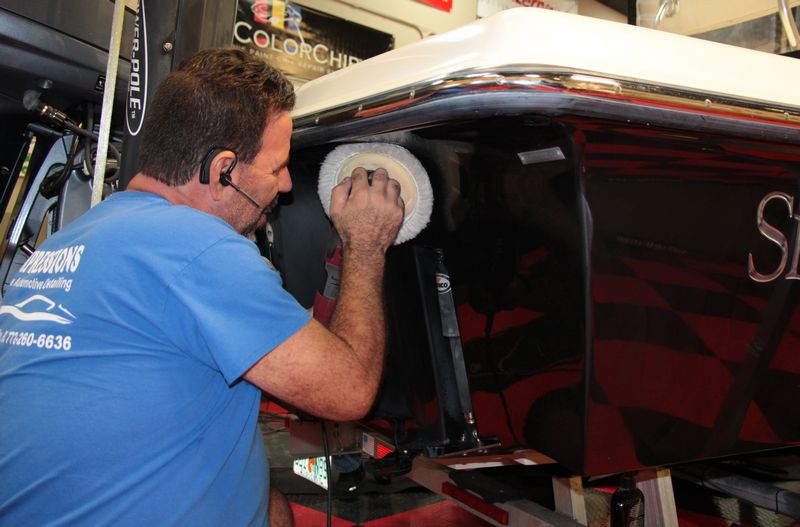 I believe when it comes to doing the grunt work you have to lead by exmaple.... 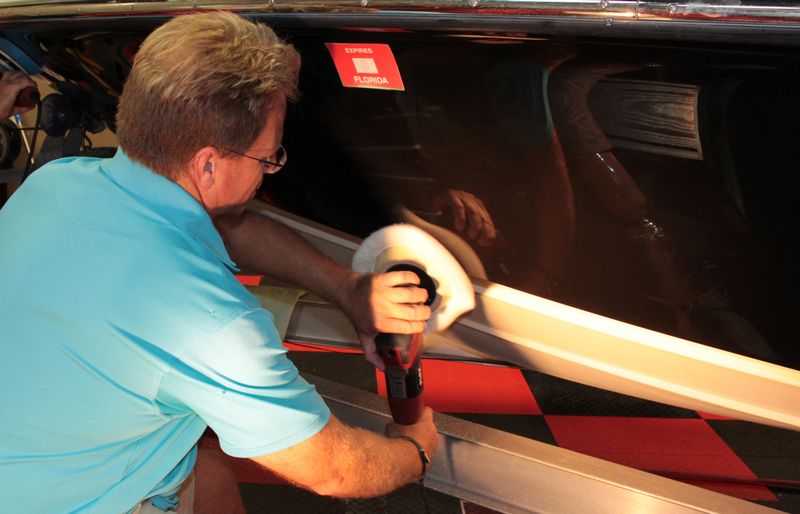 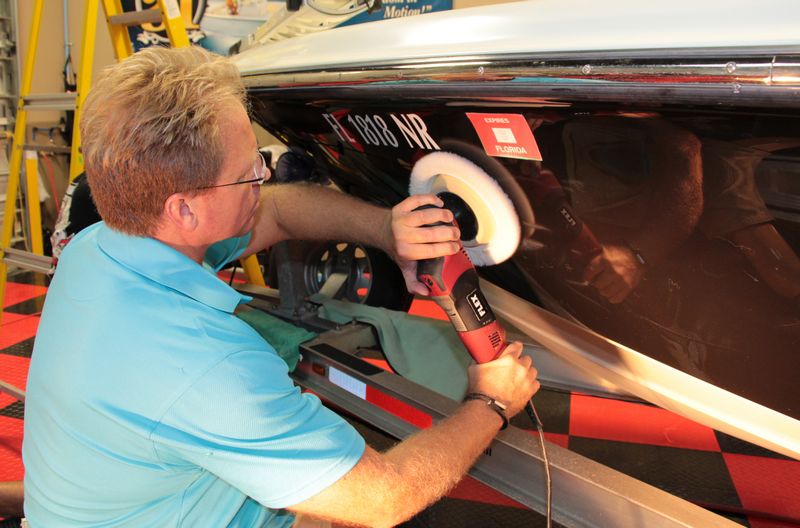 Up next.... polishing....
__________________
Made by boat people for boat people... |
|
|
|
|
05-06-2014, 02:05 PM
|
#5 |
|
Status: Director of Training
Join Date: Apr 2013
Posts: 675
|
While a portion of our team was doing the sanding and compounding, some of the other guys were using the Rupes TA50 with microfiber cutting discs to remove the oxidation, stains and water spots around the lettering for the word Shearwater.
Question? How do you work in small, tight areas? These graphics that spell out Shearwater are a soft form of plastic that feels like rubber. If you run a FULL SIZE wool cutting pad on a rotary buffer over them you will harm them and even disfigure them. Answer... The Rupes TA50 to the rescue! - I LOVE THIS TOOL! I've been buffing out cars all my life and I've been waiting for a mini tool like this for doing intricate work and after using one time to remove oxidation I LOVE this tool This is a must have tool if you buff a lot of cars and have an air compressor... check it out... First we took a 6" Meguiar's DMX6 DA Microfiber Xtra Cut Disc and cut 2" discs out of it. 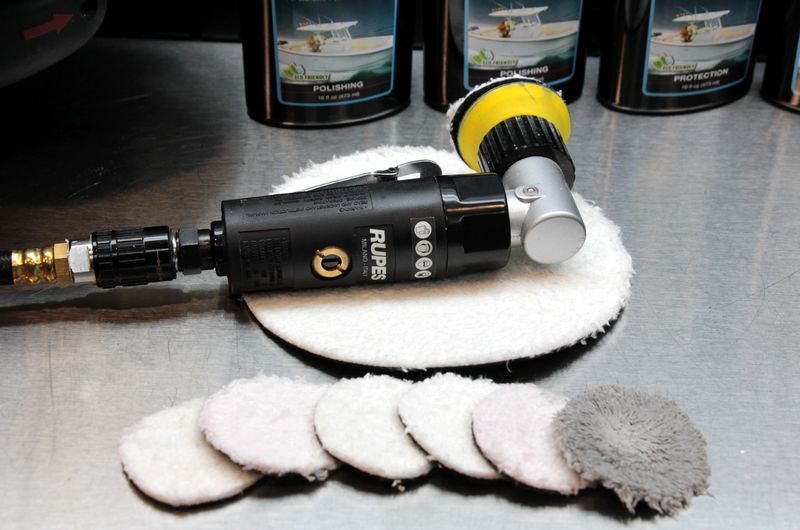  The discs fit onto the velcro hook material on the Rupes 2" backing plate.   Then using Marine 31 Final Step Polish I removed the oxidation around the bottom of the lettering... 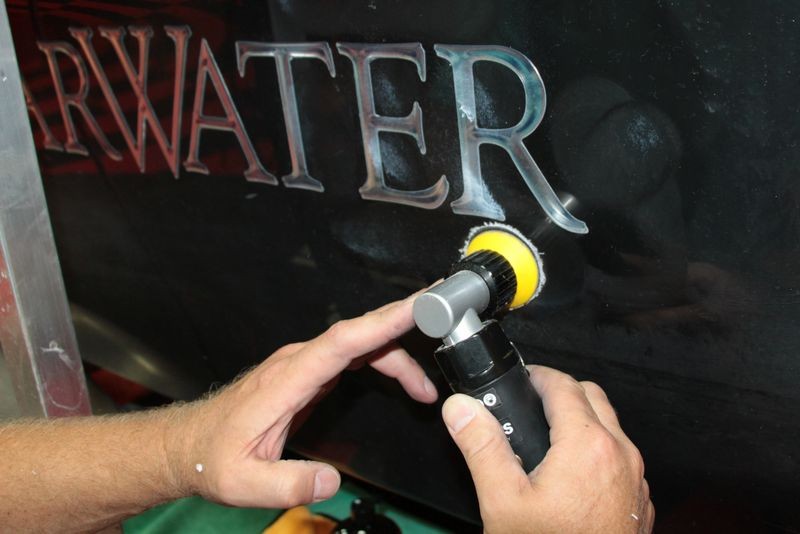  Next by tilting the tool and working on edge I could get inside all the small areas of oxidized gel-coat inside and around the letters.     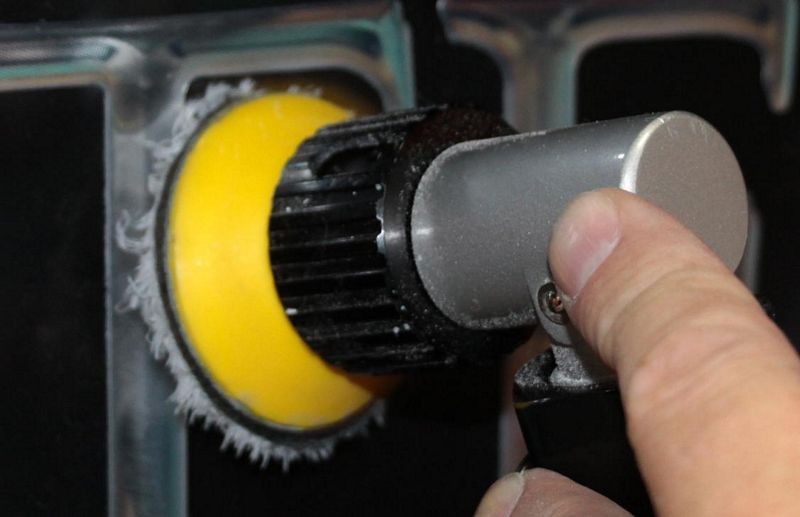 In the shots above the tool is actually running at full speed or wide-open but it looks like the pad is not spinning due the the camera settings and camera flash. This tool never bogged down. It made quick work of doing some real painstaking polishing. Here's Ozzy, a friend of Franks, this is the first time he's ever heard of this tool let alone used it...  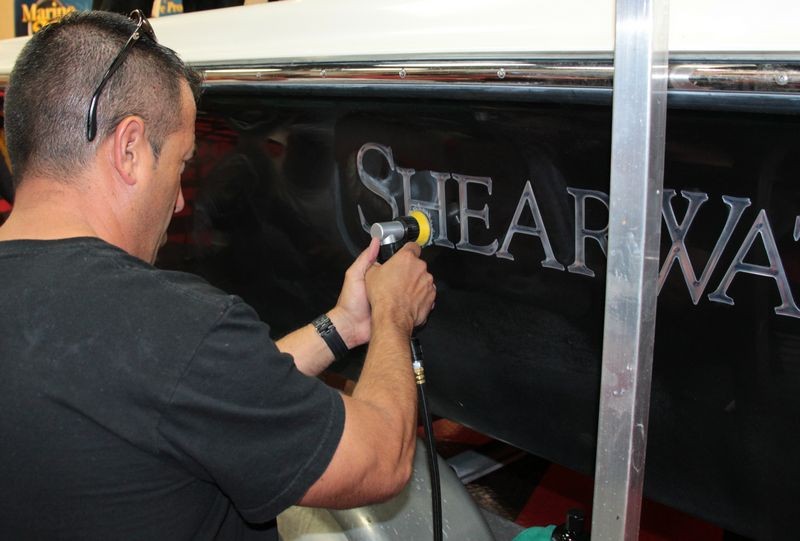 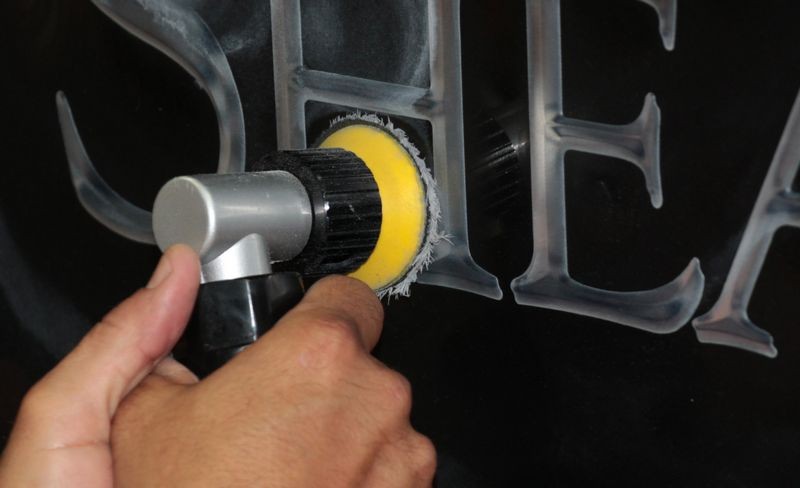 Here's Robert DiTerrlizzi working like a surgeon with the Rupes TA50 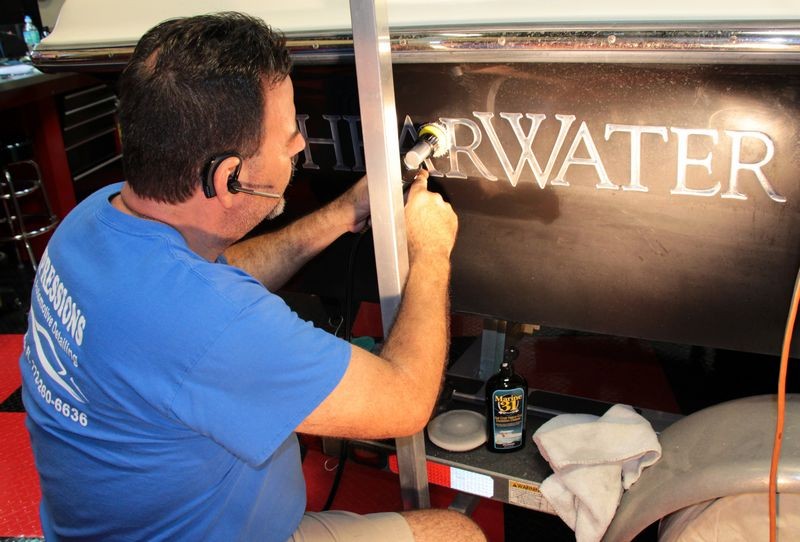 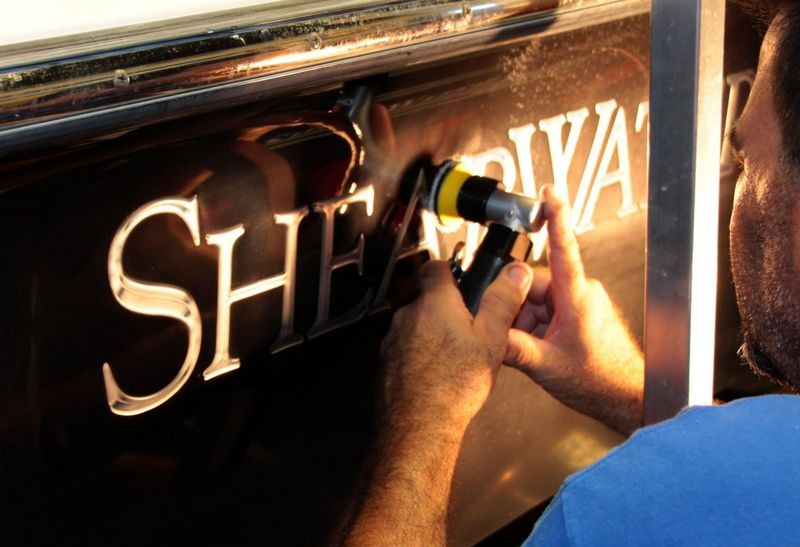 Here's our friend John from India using the Rupes TA50 like a pro... 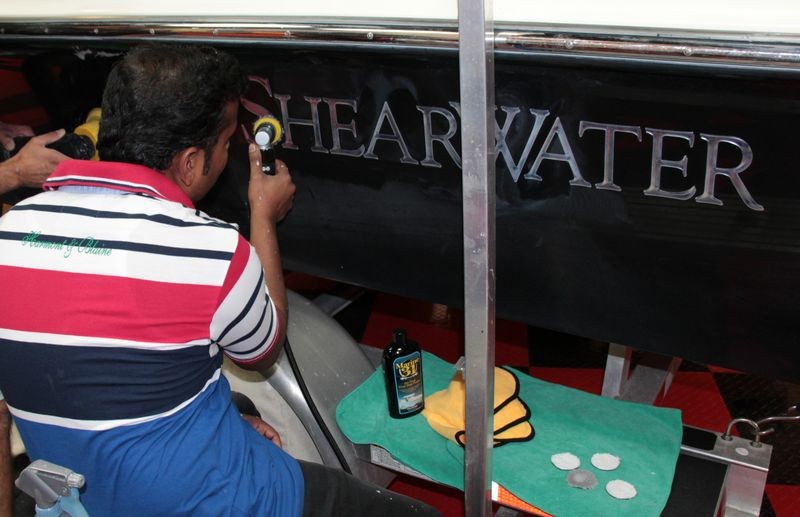 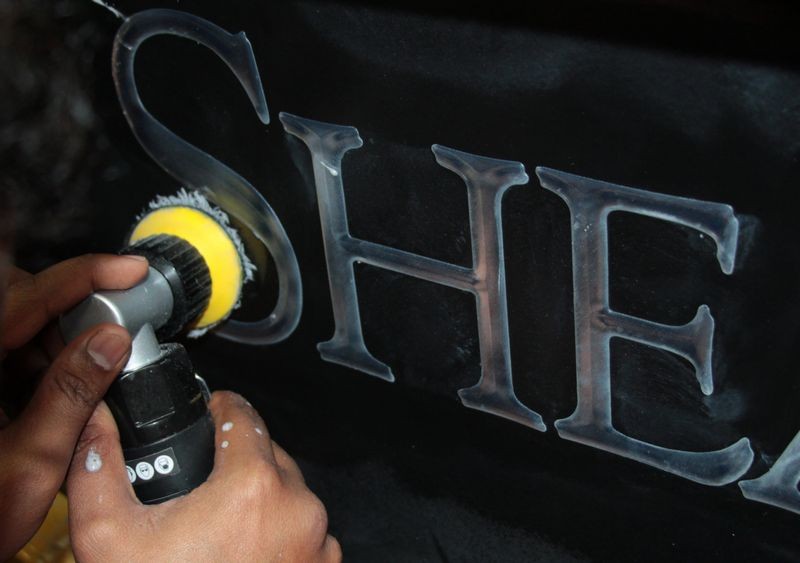 Get one! Rupes TA50 Mini Random Orbital Sander Meguiars DMX6 DA Microfiber Xtra Cut Disc, 6 inches
__________________
Made by boat people for boat people... |
|
|
|
|
05-06-2014, 02:05 PM
|
#6 |
|
Status: Director of Training
Join Date: Apr 2013
Posts: 675
|
After compounding the side of the hull to remove the scratches next up we switch to foam pads and Flex 3401 Forced Rotation & Forced Oscillation polishers to machine polish the gel-coat.
Gerald This was Gerald's first time using a Flex 3401 but he picked up on it like a duck to water.  Robert We started out using the White Hybrid pads but after some testing found the more aggressive Blue Light Cutting Hybrid pads were both cleaning up the swirls left by the wool pads AND leaving behind a better, more clear finish than the softer foam pads. Just to note... gel-coats don't react to polishing like clear coat paints so you have to think outside the box and do some testing to dial in a process that works for you and your boat. 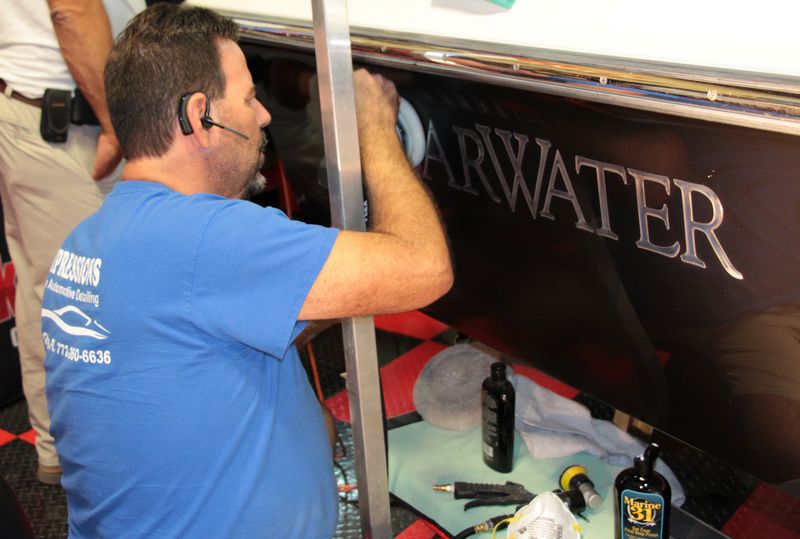 LOOK AT THE REFLECTIONS! If you look past Robert and down the side of the boat, look at how nice the finish is coming out and we haven't even waxed her yet! 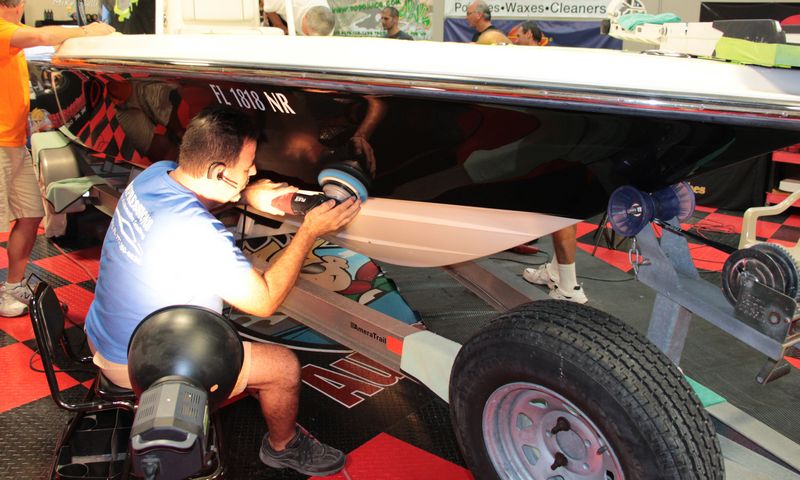  Polish Residue Besides buffing, we always need help wiping... 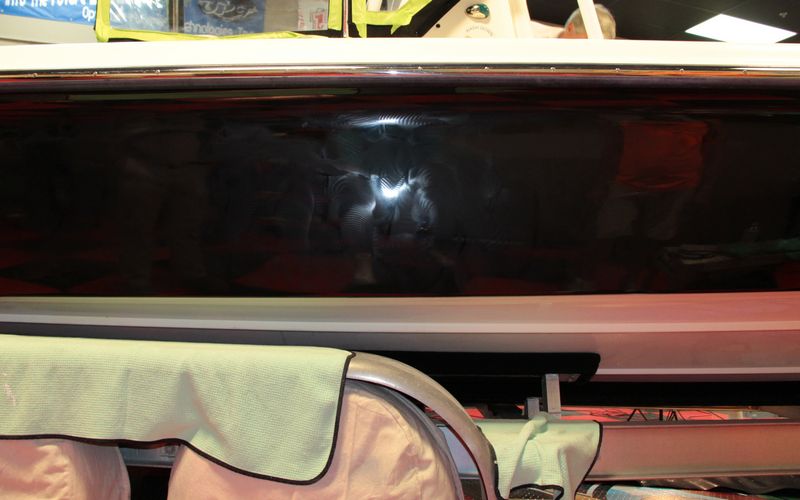 Gerald to the rescue.... 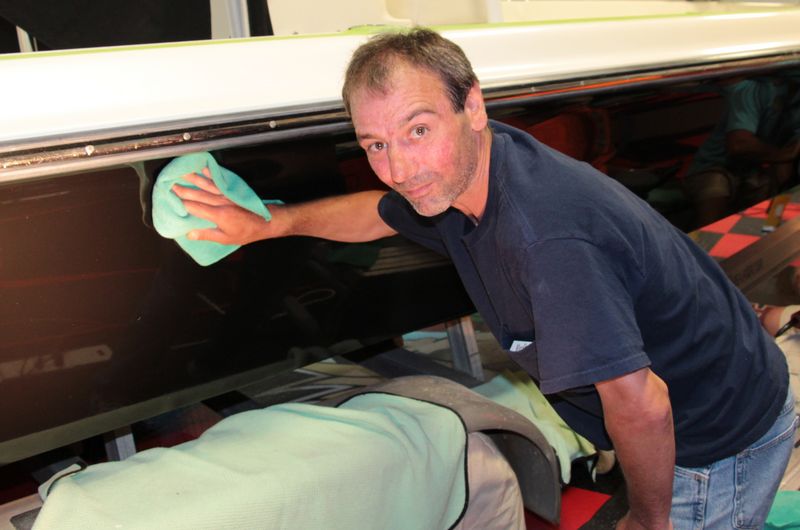 Teamwork Check out this shot, first there's John polishing up front, then Jay in the middle, followed by Chris!  John 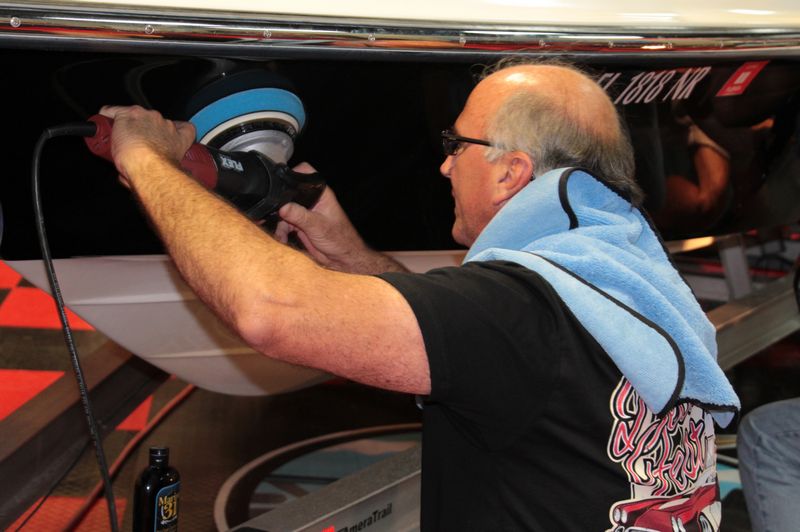 Jay 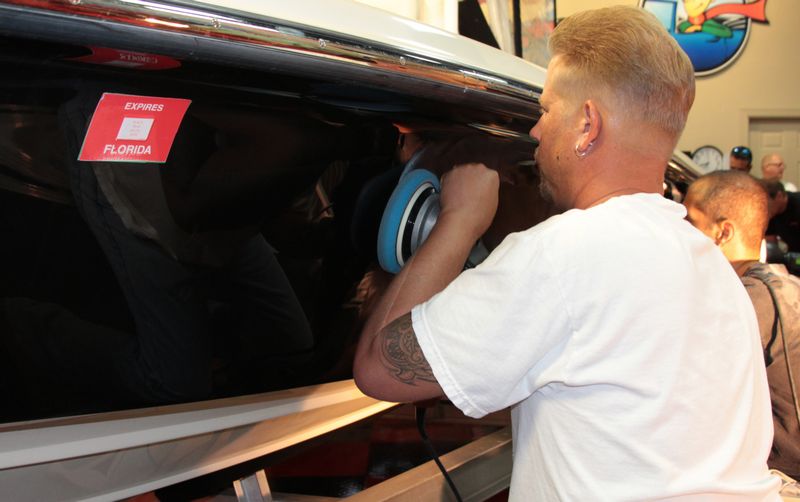 Chris  Chris can always be trusted to do the job right!  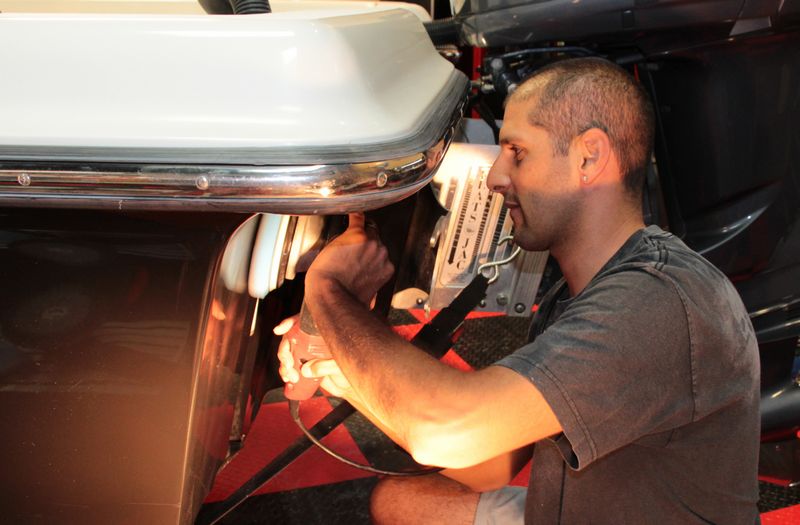 Pizza Time! Thank you Eric for springing for the pizza! 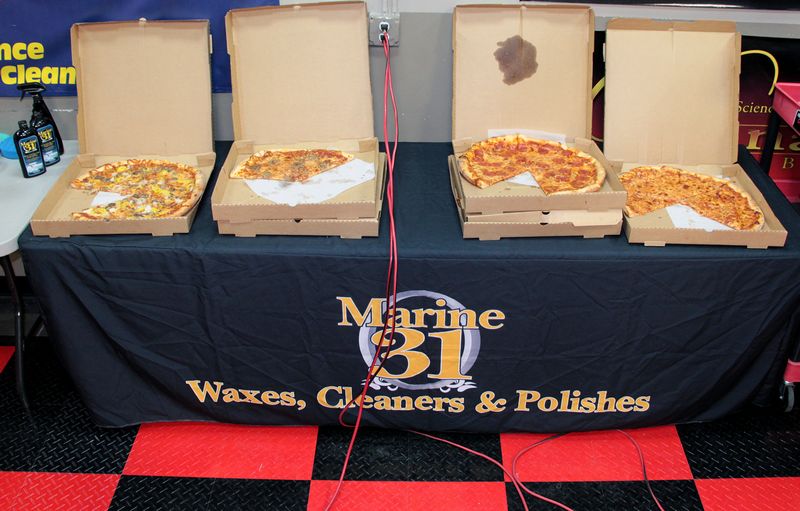 Hungry John! You don't have to call John twice for dinner! 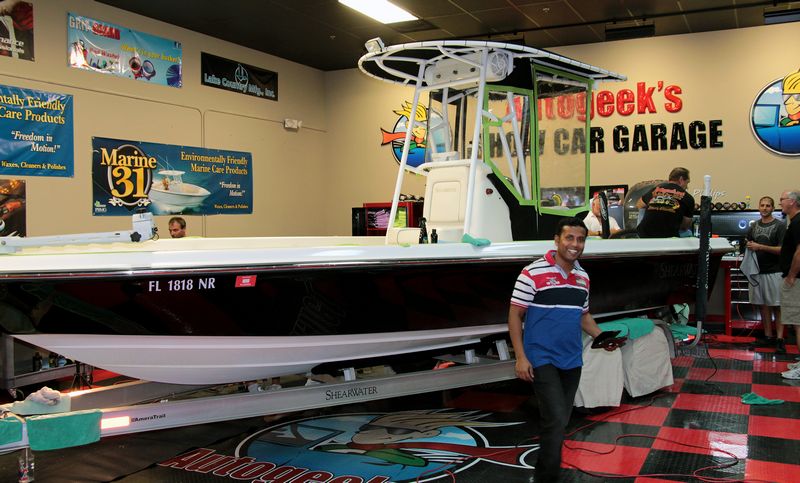 :dblthumb2:
__________________
Made by boat people for boat people... |
|
|
|
|
05-06-2014, 02:06 PM
|
#7 |
|
Status: Director of Training
Join Date: Apr 2013
Posts: 675
|
Sealing the Gel-Coat
After polishing the hull the next step was to seal the hull. For this we're going to machine apply the Marine 31 Gel Coat Carnauba Wax + Sealant. Craig Here's Craig pouring some wax directly onto the face of a soft, blue foam waxing pad attached to a 5" DA Backing Plate on a Porter Cable 7424XP. 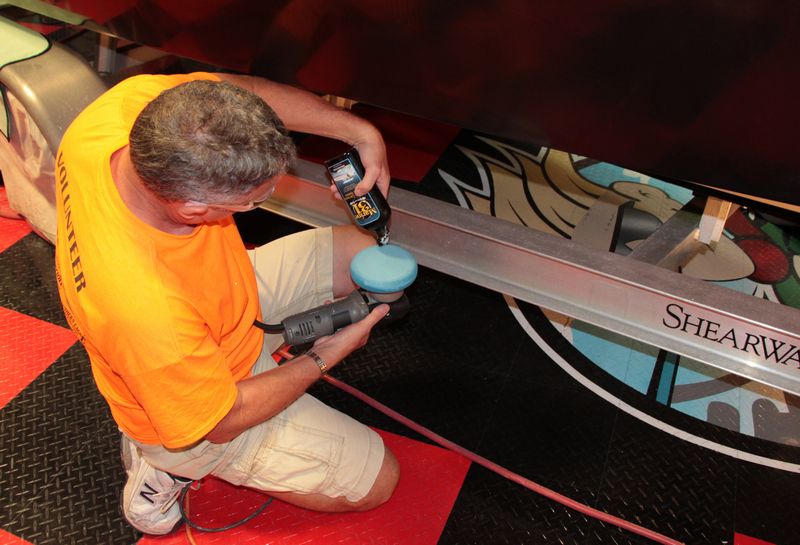  Speed Setting For machine applying a non-cleaning finishing wax, you don't need nor want the fast speed setting but instead just enough speed to maintain light pad rotating and that's just to make it easier to move the pad over the surface. For the Porter Cable this would be the 4-5 speed setting.  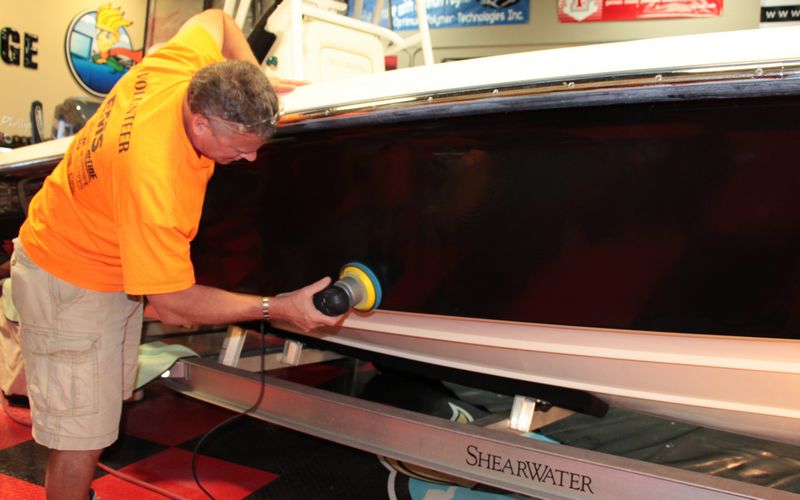 Mark you backing plate Always mark your backing plate to make it easy for your eyes to verify that it's rotating. This is more important when compounding, polishing and using a one-step cleaner/wax than it is when using a finishing wax like we're using for this project. 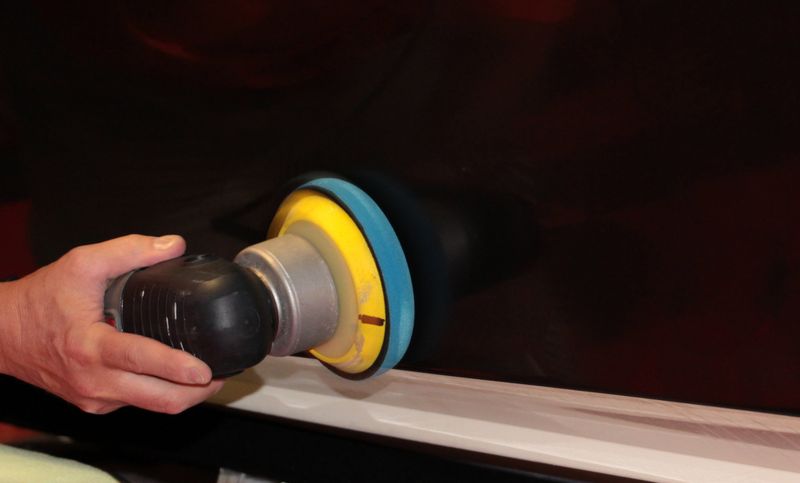 John's turn... Hey when you fly all the way from India and show up at Autogeek's Show Car Garage I'm going to put you to work. 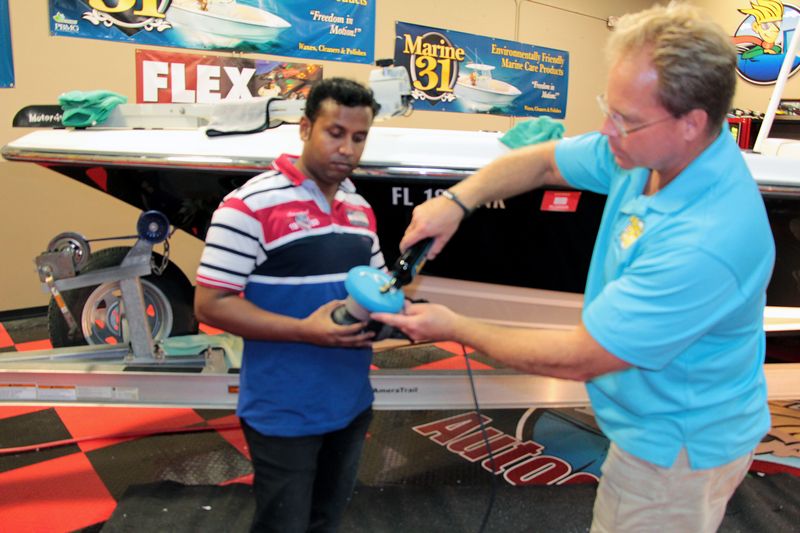  First a quick lesson on correct machine waxing technique... 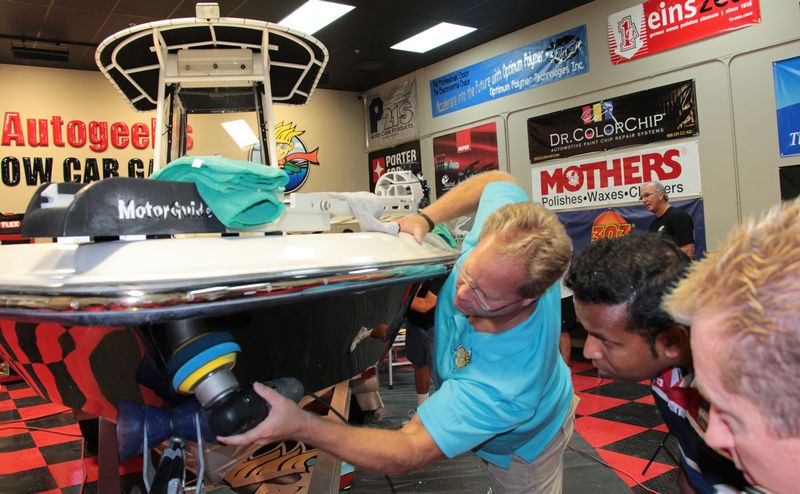 Your turn! 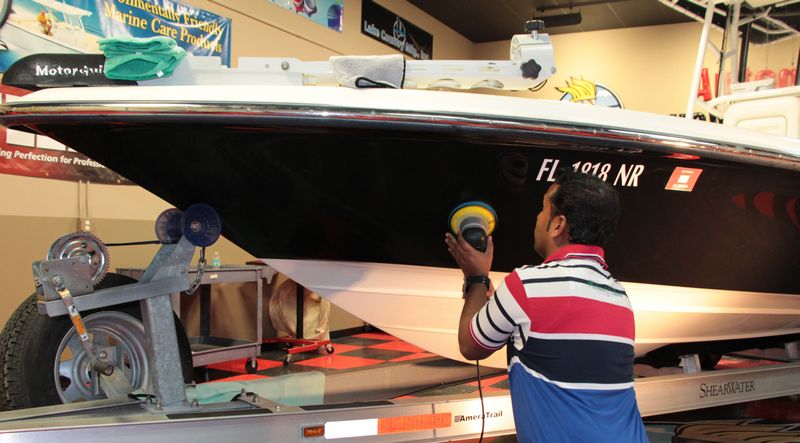 Meanwhile back on the farm Chris takes a Selfie...  Wax on - Wax off! After letting the wax fully dry it's time to carefully wipe it off....  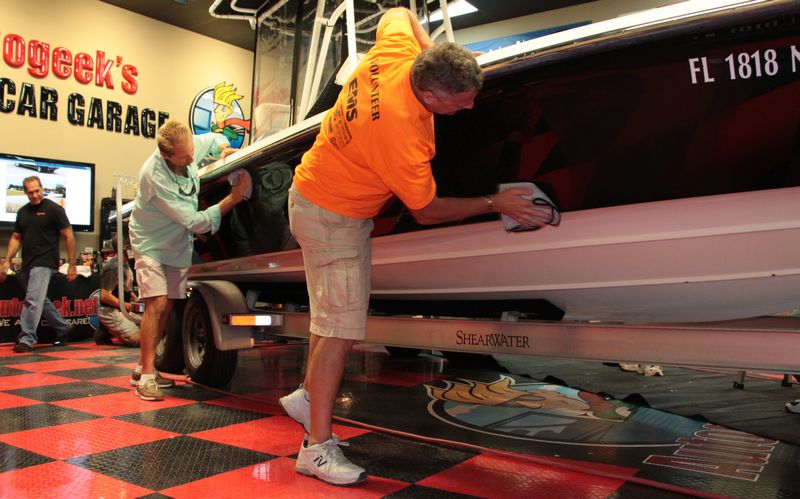 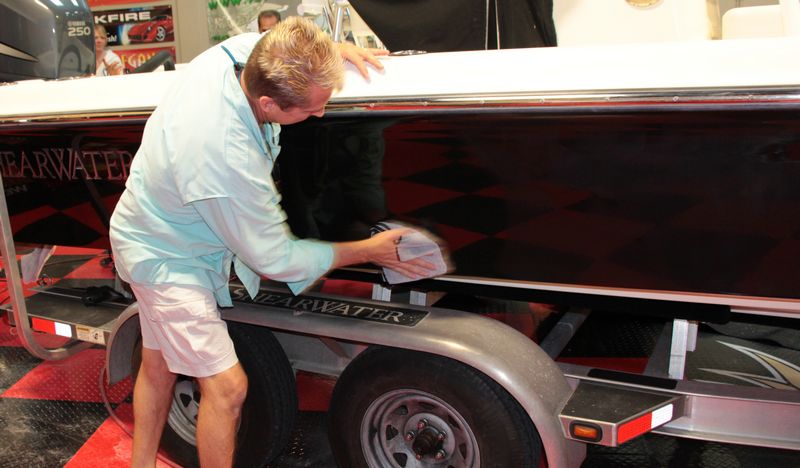 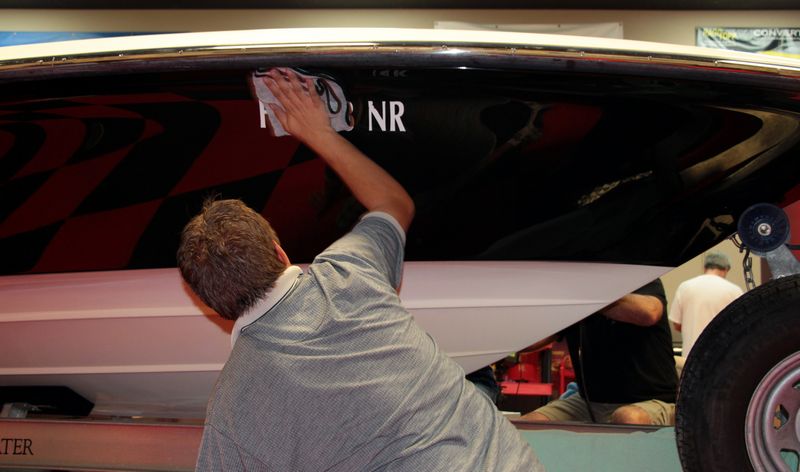 Remember the sides of this boat were WHITE with zero reflection when we started!  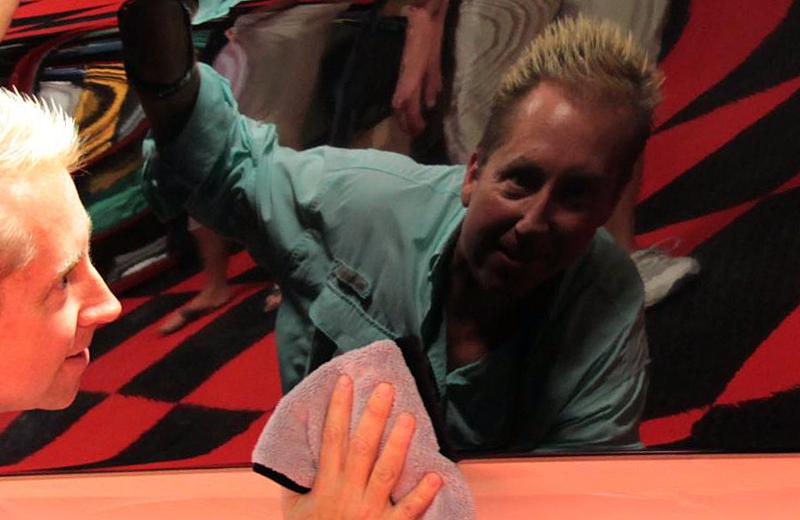 To help your memory.... Water Spot Stains & Oxidation Not only is the entire hull filled with holograms from the misuse of a rotary buffer, (the normal practice by most boat detailers), the gel-coat is also oxidized and covered with water spot stains. 
__________________
Made by boat people for boat people... |
|
|
|
|
05-06-2014, 02:07 PM
|
#8 |
|
Status: Director of Training
Join Date: Apr 2013
Posts: 675
|
But there's more!
While some of us were sanding, compounding, polishing and waxing the hull the rest of were working top side. For the top side or cap of the boat we used the Marine 31 All-In-One Gel Coat Polish & Wax with Thick Purple Foamed Wool Pads on the powerful Flex 3401 Forced Rotation, Forced Oscillation dual action polishers. Note: The THIN PFW's are for the Porter Cable style polishers. Ozzy Here's Ozzy removing oxidation, polishing and waxing in one step. 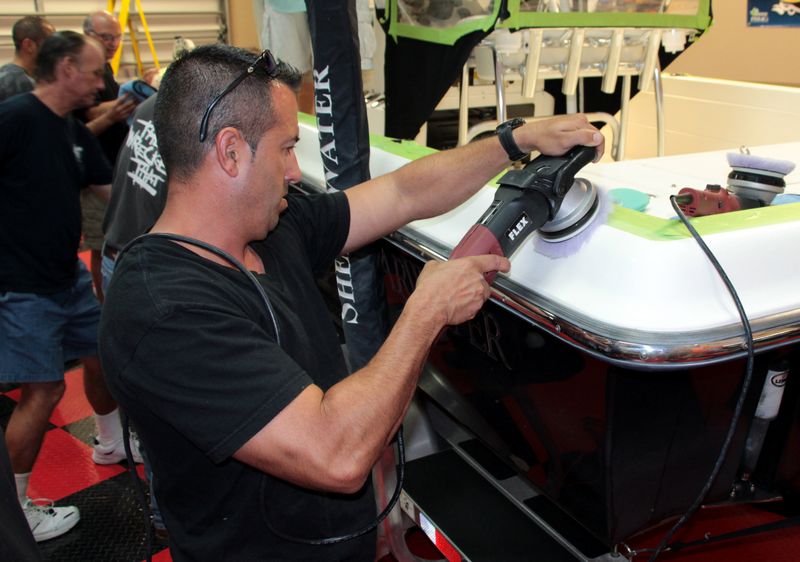 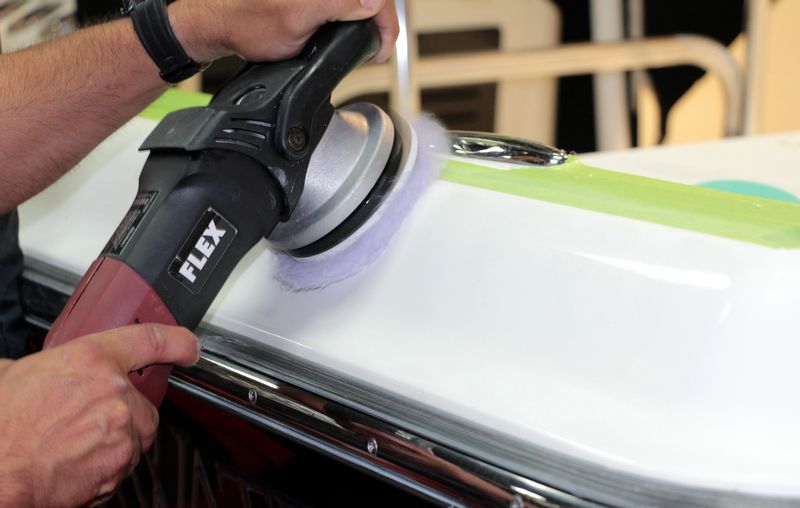 Serge This was Serge's first time to one of our Thursday night projects and his first time using a Flex 3401. Serge is restoring a 1970's Glastron ski boat. 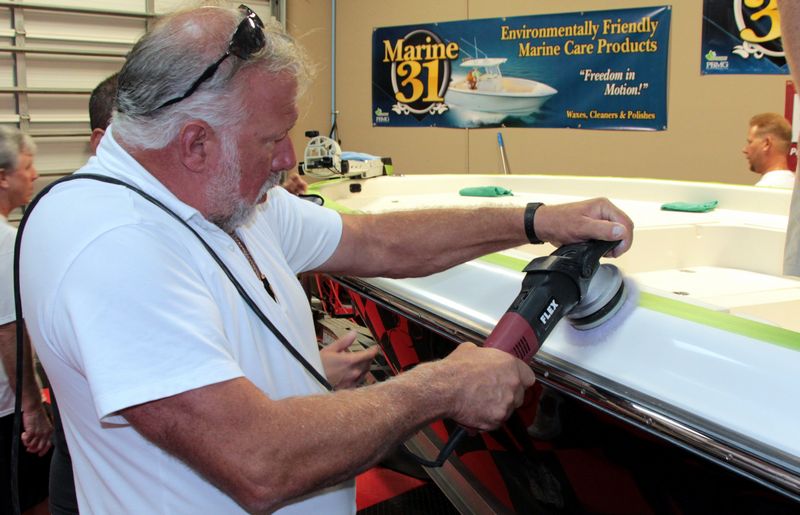 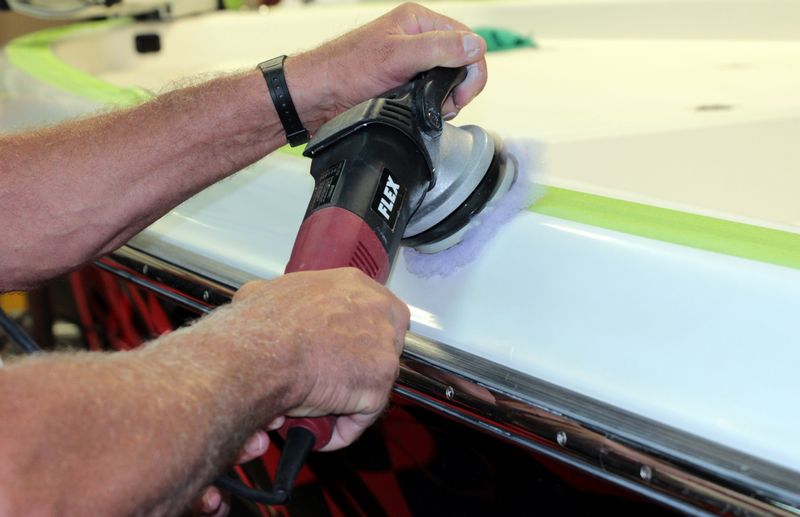 Chris Here's Chris helping out with the cap...  Den Here's Den working on the inside of the cap. Notice how we taped-off all the NON-SKID surfaces with 3M Painter's Tape? Thats so we would not creme over this textured surface with compounds, polishes and waxes as it could embedded or impact into the non-skid surface and then we'd have to clean it out. Den by the way is not only a regular with us for our Thursday night projects but built and polished this old 2-door Pontiac. 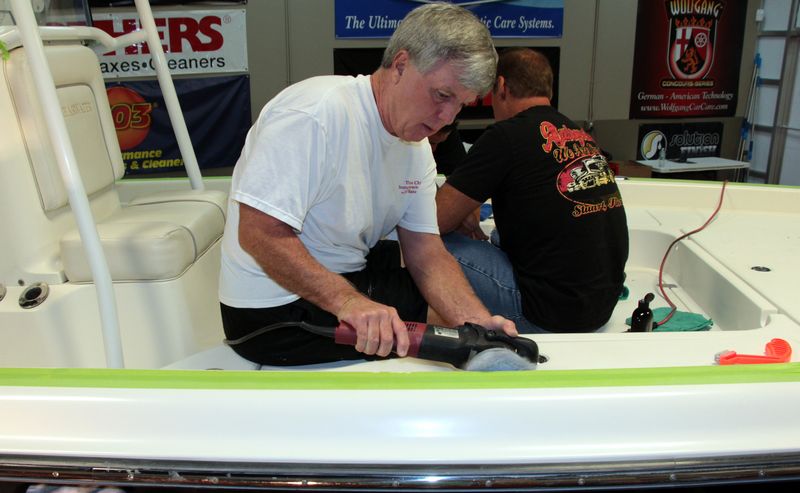 Chris Chris is like a "floater" that is he has both the skill and experience to tackle any part of any project we're working on so he tends to float around and tackle anything that might be un-noticed. Thanks Chris! John In the background John contemplates his life and thinks about buying and restoring his dream car a 1987 Yugo.  Den Here's Den applying a second coat of wax for extra protection and gloss using a Griot's Garage 3" Mini Polisher with Marine 31 Gel-Coat Carnauba Wax + Sealant. Den shows his professionalism by removing his shoes so as not to leave any shoe marks on the non-skid from his street shoes. :xyxthumbs:  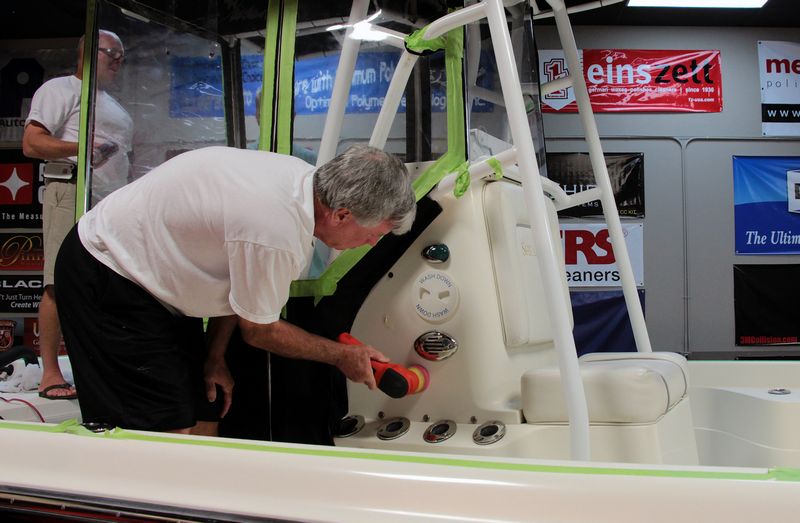 Eric & Gary The Eisenglass, (flexible plastic windows), was very cloudy and scuffed when this boat arrived so I put the owner Eric and his buddy to work machine polishing the plastic to restore clarity.     You talking to me pal?  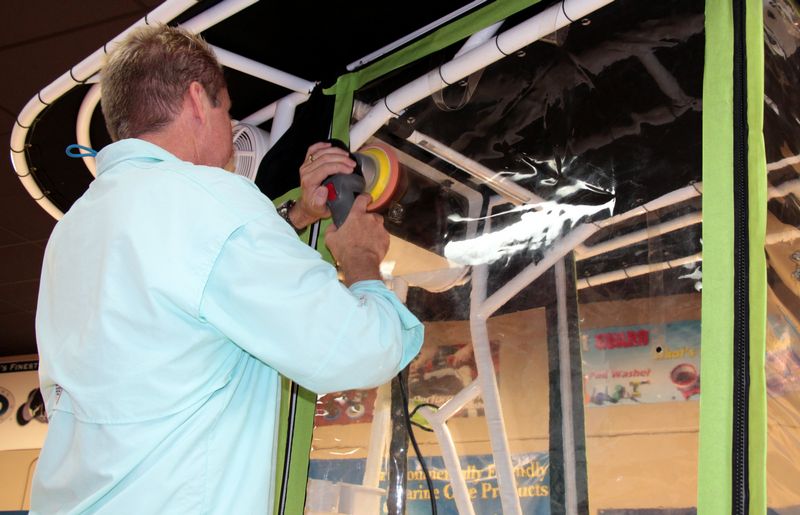 Metal Polishing the EASY WAY! The stainless steel prop has the beginning signs of rust, these props are very expensive so my advice to boat owners is anytime you have your boat out of the water, take a few minutes to quickly polish the prop to clean it and protect it.  Eric is using Marine 31 Stainless Steel and Aluminum Brightening Soap which is probably the easiest metal polish and metal polishing method to clean, polish and protect all metal surfaces. Here's how easy it is... 1. Start by getting the included sponge wet with water and then wring it out. 2. Then swipe the sponge across the soap in the jar. 3. Rub the sponge and the metal polishing soap over the surface. 4. Wipe or rinse the surface clean. Check it out.... 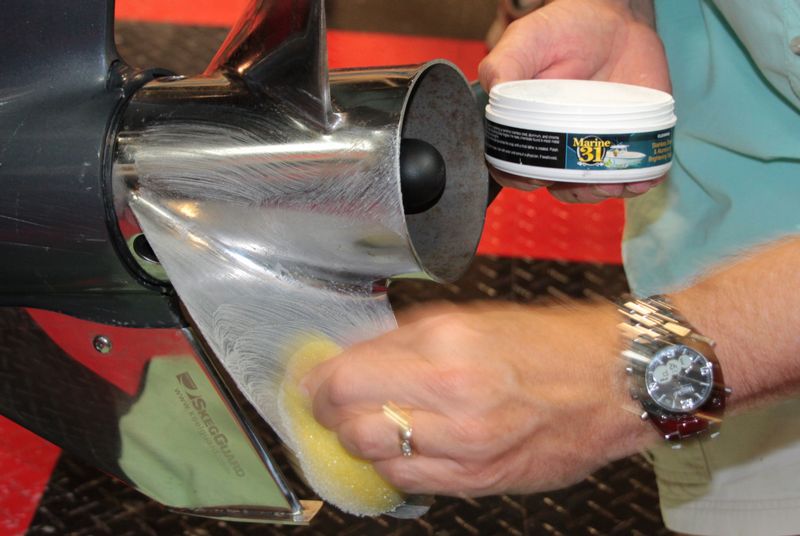 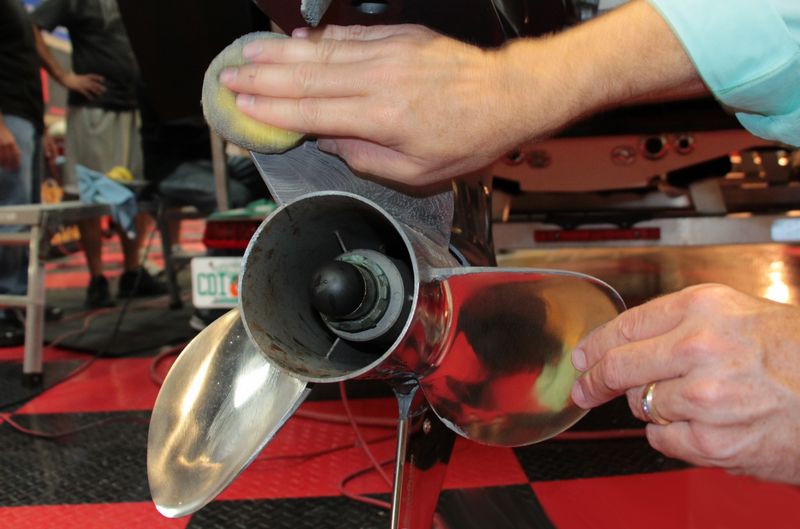 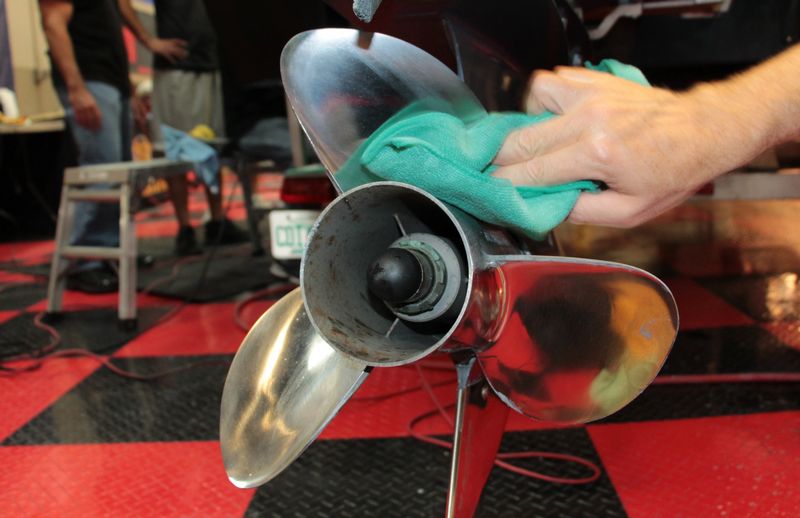 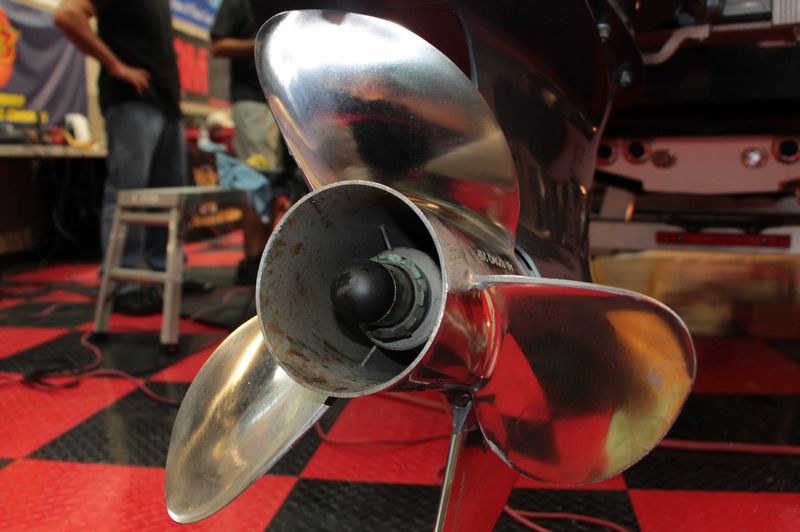 Clean, shiny AND protected!  
__________________
Made by boat people for boat people... |
|
|
|
|
05-06-2014, 02:08 PM
|
#9 |
|
Status: Director of Training
Join Date: Apr 2013
Posts: 675
|
Finished!
Wait till you see the pictures!  The Rupes TA50 and the Rupes Duetto were killer for this boat!  We cut up 2" Meguiar's Xtra Cut MF Discs to to remove the oxidation around the lettering on the back of the boat and it worked awesome! We used the Duetto and the Rupes #3000 sanding discs to sand down the entire boat. Most of the guys had never machine sanded and none of the guys had used the Rupes TA50 before. And best of all, (besides the boat coming out looking like brand new), was John from India was able to join us!
__________________
Made by boat people for boat people... |
|
|
|
|
05-06-2014, 02:08 PM
|
#10 |
|
Status: Director of Training
Join Date: Apr 2013
Posts: 675
|
Here are the final results from a LOT of hard work and teamwork...
__________________
Made by boat people for boat people... |
|
|
|
|
| Currently Active Users Viewing This Thread: 48 (0 members and 48 guests) | |
|
|
